Australia’s fake Phone Numbers

For TV, Books, Movies, etc, ACMA have allocated a series of fake phone numbers that can be used, that will not connect,

Check out this great Tom Scott video on the topic of fake phone numbers, for the why.

In Australia they are:

  • Premium Rate Number 1900 654 321
  • Central East (covering NSW and ACT) / (02) 5550 xxxx and (02) 7010 xxxx
  • South East (covering VIC and TAS) / (03) 5550 xxxx and (03) 7010 xxxx
  • North East (covering QLD) / (07) 5550 xxxx and (07) 7010 xxxx
  • Central West (covering SA, WA and NT) / (08) 5550 xxxx and (08) 7010 xxxx
  • Some (but not all) mobile starting with 0491 570 xxx
  • Some (but not all) Freephone / Local rate starting with 1800 975 xxx

More info on ACMA Website

IMS Routing with iFCs

SIP routing is complicated, there’s edge cases, traffic that can be switched locally and other traffic that needs to be proxied off to another Proxy or Application server. How can you define these rules and logic in a flexible way, that allows these rules to be distributed out to multiple different network elements and adjusted on a per-subscriber basis?

Enter iFCs – The Initial Filter Criteria.

iFCs are XML encoded rules to define which servers should handle traffic matching a set of rules.

Let’s look at some example rules we might want to handle through iFCs:

  • Send all SIP NOTIFY, SUBSCRIBE and PUBLISH requests to a presence server
  • Any Mobile Originated SMS to an SMSc
  • Calls to a specific destination to a MGC
  • Route any SIP INVITE requests with video codecs present to a VC bridge
  • Send calls to Subscribers who aren’t registered to a Voicemail server
  • Use 3rd party registration to alert a server that a Subscriber has registered

All of these can be defined and executed through iFCs, so let’s take a look,

iFC Structure

iFCs are encoded in XML and typically contained in the Cx-user-data AVP presented in a Cx Server Assignment Answer response.

Let’s take a look at an example iFC and then break down the details as to what we’re specifying.

<InitialFilterCriteria>
    <Priority>10</Priority>
    <TriggerPoint>
        <ConditionTypeCNF>1</ConditionTypeCNF>
        <SPT>
            <ConditionNegated>0</ConditionNegated>
            <Group>0</Group>
            <Method>MESSAGE</Method>
        </SPT>
        <SPT>
            <ConditionNegated>0</ConditionNegated>
            <Group>1</Group>
            <SessionCase>0</SessionCase>
        </SPT>
    </TriggerPoint>
    <ApplicationServer>
        <ServerName>sip:smsc.mnc001.mcc001.3gppnetwork.org:5060</ServerName>
        <DefaultHandling>0</DefaultHandling>
    </ApplicationServer>
</InitialFilterCriteria>

Each rule in an iFC is made up of a Priority, TriggerPoint and ApplicationServer.

So for starters we’ll look at the Priority tag.
The Priority tag allows us to have multiple-tiers of priority and multiple levels of matching,
For example if we had traffic matching the conditions outlined in this rule (TriggerPoint) but also matching another rule with a lower priority, the lower priority rule would take precedence.

Inside our <TriggerPoint> tag contains the specifics of the rules and how the rules will be joined / matched, which is what we’ll focus on predominantly, and is followed by the <ApplicationServer> which is where we will route the traffic to if the TriggerPoint is matched / triggered.

So let’s look a bit more about what’s going on inside the TriggerPoint.

Each TriggerPoint is made up of Service Point Trigger (SPTs) which are individual rules that are matched or not matched, that are either combined as logical AND or logical OR statements when evaluated.

By using fairly simple building blocks of SPTs we can create a complex set of rules by joining them together.

Service Point Triggers (SPTs)

Let’s take a closer look at what goes on in an SPT.
Below is a simple SPT that will match all SIP requests using the SIP MESSAGE method request type:

        <SPT>
            <ConditionNegated>0</ConditionNegated>
            <Group>0</Group>
            <Method>MESSAGE</Method>
        </SPT>

So as you may have guessed, the <Method> tag inside the SPT defines what SIP request method we’re going to match.

But Method is only one example of the matching mechanism we can use, but we can also match on other attributes, such as Request URI, SIP Header, Session Case (Mobile Originated vs Mobile Terminated) and Session Description such as SDP.

Or an example of a SPT for anything Originating from the Subscriber utilizing the <SessionCase> tag inside the SPT.

        <SPT>
            <ConditionNegated>0</ConditionNegated>
            <Group>0</Group>
            <SessionCase>0</SessionCase>
        </SPT>

Below is another SPT that’s matching any requests where the request URI is sip:[email protected] by setting the <RequestURI> tag inside the SPT:

        <SPT>
            <ConditionNegated>0</ConditionNegated>
            <Group>0</Group>
            <RequestURI>sip:[email protected]</RequestURI>
        </SPT>

We can match SIP headers, either looking for the existence of a header or the value it is set too,

        <SPT>
            <ConditionNegated>0</ConditionNegated>
            <Group>0</Group>
            <SIPHeader>
              <Header>To</Header>
              <Content>"Nick"</Content>
            </SIPHeader>
        </SPT>

Having <Header> will match if the header is present, while the optional Content tag can be used to match

In terms of the Content this is matched using Regular Expressions, but in this case, not so regular regular expressions. 3GPP selected Extended Regular Expressions (ERE) to be used (IEEE POSIX) which are similar to the de facto standard PCRE Regex, but with a few fewer parameters.

Condition Negated

The <ConditionNegated> tag inside the SPT allows us to do an inverse match.

In short it will match anything other than what is specified in the SPT.

For example if we wanted to match any SIP Methods other than MESSAGE, setting <ConditionNegated>1</ConditionNegated> would do just that, as shown below:

        <SPT>
            <ConditionNegated>1</ConditionNegated>
            <Group>0</Group>
            <Method>MESSAGE</Method>
        </SPT>

And another example of ConditionNegated in use, this time we’re matching anything where the Request URI is not sip:[email protected]:

        <SPT>
            <ConditionNegated>1</ConditionNegated>
            <Group>0</Group>
            <RequestURI>sip:[email protected]</RequestURI>
        </SPT>

Finally the <Group> tag allows us to group together a group of rules for the purpose of evaluating.
We’ll go into it more in in the below section.

ConditionTypeCNF / ConditionTypeDNF

As we touched on earlier, <TriggerPoints> contain all the SPTs, but also, very importantly, specify how they will be interpreted.

SPTs can be joined in AND or OR conditions.

For some scenarios we may want to match where METHOD is MESSAGE and RequestURI is sip:[email protected], which is different to matching where the METHOD is MESSAGE or RequestURI is sip:[email protected].

This behaviour is set by the presence of one of the ConditionTypeCNF (Conjunctive Normal Form) or ConditionTypeDNF (Disjunctive Normal Form) tags.

If each SPT has a unique number in the GroupTag and ConditionTypeCNF is set then we evaluate as AND.

If each SPT has a unique number in the GroupTag and ConditionTypeDNF is set then we evaluate as OR.

Let’s look at how the below rule is evaluated as AND as ConditionTypeCNF is set:

<InitialFilterCriteria>
    <Priority>10</Priority>
    <TriggerPoint>
        <ConditionTypeCNF>1</ConditionTypeCNF>
        <SPT>
            <ConditionNegated>0</ConditionNegated>
            <Group>0</Group>
            <Method>MESSAGE</Method>
        </SPT>
        <SPT>
            <ConditionNegated>0</ConditionNegated>
            <Group>1</Group>
            <SessionCase>0</SessionCase>
        </SPT>
    </TriggerPoint>
    <ApplicationServer>
        <ServerName>sip:smsc.mnc001.mcc001.3gppnetwork.org:5060</ServerName>
        <DefaultHandling>0</DefaultHandling>
    </ApplicationServer>
</InitialFilterCriteria>

This means we will match if the method is MESSAGE and Session Case is 0 (Mobile Originated) as each SPT is in a different Group which leads to “and” behaviour.

If we were to flip to ConditionTypeDNF each of the SPTs are evaluated as OR.

<InitialFilterCriteria>
    <Priority>10</Priority>
    <TriggerPoint>
        <ConditionTypeDNF>1</ConditionTypeDNF>
        <SPT>
            <ConditionNegated>0</ConditionNegated>
            <Group>0</Group>
            <Method>MESSAGE</Method>
        </SPT>
        <SPT>
            <ConditionNegated>0</ConditionNegated>
            <Group>1</Group>
            <SessionCase>0</SessionCase>
        </SPT>
    </TriggerPoint>
    <ApplicationServer>
        <ServerName>sip:smsc.mnc001.mcc001.3gppnetwork.org:5060</ServerName>
        <DefaultHandling>0</DefaultHandling>
    </ApplicationServer>
</InitialFilterCriteria>

This means we will match if the method is MESSAGE and Session Case is 0 (Mobile Originated).

Where this gets a little bit more complex is when we have multiple entries in the same Group tag.

Let’s say we have a trigger point made up of:

<SPT><Method>MESSAGE</Method><Group>1</Group></SPT>
<SPT><SessionCase>0</SessionCase><Group>1</Group></SPT> 

<SPT><Header>P-Some-Header</Header><Group>2</Group></SPT> 

How would this be evaluated?

If we use ConditionTypeDNF every SPT inside the same Group are matched as AND, and SPTs with distinct are matched as OR.

Let’s look at our example rule evaluated as ConditionTypeDNF:

<ConditionTypeDNF>1</ConditionTypeDNF>
  <SPT><Method>MESSAGE</Method><Group>1</Group></SPT>
  <SPT><SessionCase>0</SessionCase><Group>1</Group></SPT> 

  <SPT><Header>P-Some-Header</Header><Group>2</Group></SPT> 

This means the two entries in Group 1 are evaluated as AND – So Method is message and Session Case is 0, OR the header “P-Some-Header” is present.

Let’s do another one, this time as ConditionTypeCNF:

<ConditionTypeCNF>1</ConditionTypeCNF>
  <SPT><Method>MESSAGE</Method><Group>1</Group></SPT>
  <SPT><SessionCase>0</SessionCase><Group>1</Group></SPT> 

  <SPT><Header>P-Some-Header</Header><Group>2</Group></SPT> 

This means the two entries in Group 1 are evaluated as OR – So Method is message OR Session Case is 0, AND the header “P-Some-Header” is present.

Pre-5G Network Slicing

Network Slicing, is a new 5G Technology. Or is it?

Pre 3GPP Release 16 the capability to “Slice” a network already existed, in fact the functionality was introduced way back at the advent of GPRS, so what is so new about 5G’s Network Slicing?

Network Slice: A logical network that provides specific network capabilities and network characteristics

3GPP TS 123 501 / 3 Definitions and Abbreviations

Let’s look at the old and the new ways, of slicing up networks, pre release 16, on LTE, UMTS and GSM.

Old Ways: APN Separation

The APN or “Access Point Name” is used so the SGSN / MME knows which gateway to that subscriber’s traffic should be terminated on when setting up the session.

APN separation is used heavily by MVNOs where the MVNO operates their own P-GW / GGSN.
This allows the MNVO can handle their own rating / billing / subscriber management when it comes to data.
A network operator just needs to setup their SGSN / MME to point all requests to setup a bearer on the MVNO’s APN to the MNVO’s gateways, and presoto, it’s no longer their problem.

Later as customers wanted MPLS solutions extended over mobile (Typically LTE), MNOs were able to offer “private APNs”.
An enterprise could be allocated an APN by the MNO that would ensure traffic on that APN would be routed into the enterprise’s MPLS VRF.
The MNO handles the P-GW / GGSN side of things, adding the APN configuration onto it and ensuring the traffic on that APN is routed into the enterprise’s VRF.

Different QCI values can be assigned to each APN, to allow some to have higher priority than others, but by slicing at an APN level you lock all traffic to those QoS characteristics (Typically mobile devices only support one primary APN used for routing all traffic), and don’t have the flexibility to steer which networks which traffic from a subscriber goes to.

It’s not really practical for everyone to have their own APNs, due in part to the namespace limitations, the architecture of how this is usually done limits this, and the simple fact of everyone having to populate an APN unique to them would be a real headache.

5G replaces APNs with “DNNs” – Data Network Names, but the functionality is otherwise the same.

In Summary:
APN separation slices all traffic from a subscriber using a special APN and provide a bearer with QoS/QCI values set for that APN, but does not allow granular slicing of individual traffic flows, it’s an all-or-nothing approach and all traffic in the APN is treated equally.

The old Ways: Dedicated Bearers

Dedicated bearers allow traffic matching a set rule to be provided a lower QCI value than the default bearer. This allows certain traffic to/from a UE to use GBR or Non-GBR bearers for traffic matching the rule.

The rule itself is known as a “TFT” (Traffic Flow Template) and is made up of a 5 value Tuple consisting of IP Source, IP Destination, Source Port, Destination Port & Protocol Number. Both the UE and core network need to be aware of these TFTs, so the traffic matching the TFT can get the QCI allocated to it.

This can be done a variety of different ways, in LTE this ranges from rules defined in a PCRF or an external interface like those of an IMS network using the Rx interface to request a dedicated bearers matching the specified TFTs via the PCRF.

Unlike with 5G network slicing, dedicated bearers still traverse the same network elements, the same MME, S-GW & P-GW is used for this traffic. This means you can’t “locally break out” certain traffic.

In Summary:
Dedicated bearers allow you to treat certain traffic to/from subscribers with different precedence & priority, but the traffic still takes the same path to it’s ultimate destination.

Old Ways: MOCN

Multi-Operator Core Network (MOCN) allows multiple MNOs to share the same active (tower) infrastructure.

This means one eNodeB can broadcast more than one PLMN and server more than one mobile network.

This slicing is very coarse – it allows two operators to share the same eNodeBs, but going beyond a handful of PLMNs on one eNB isn’t practical, and the PLMN space is quite limited (1000 PLMNs per country code max).

In Summary:
MOCN allows slicing of the RAN on a very coarse level, to slice traffic from different operators/PLMNs sharing the same RAN.

Its use is focused on sharing RAN rather than slicing traffic for users.

Adding Vlans to VMware Workstation

Just discovered you can add VLANs to Realtek NICs on Windows PCs,

I have a fairly grunty desktop I use for running anything that needs Windows, running VMware Workstation and occasional gaming,

I do have a big Dell machine running ESXi which supports VLAN tagging and trunking, but I try and avoid using it as it’s deafeningly loud and very power hungry.

Recently as the lab network I use grows and grows I’ve been struggling to run all the VMs running in Workstation as I’ve been running out of IP space and wanting some more separation between networks.

Now I can add VLANs onto the existing NIC using the Realtek Ethernet Diagnostic Utility, and then bridge each of these NICs to the respective VM in Workstation, and the port to the Mikrotik CRS is now a trunk with all the VLANs on it.

Perfect!

Adding support for AMR Codec in FreeSWITCH

If you’re building IMS Networks, the AMR config is a must, but FreeSWITCH does not ship with AMR due to licencing constraints, but has all the hard work done, you just need to add the headers for AMR support and compile.

LibOpenCore has support for AMR which we build, and then with a few minor tweaks to copy the C++ header files over to the FreeSWITCH source directory, and enable support in modules.conf.

Then when building FreeSWITCH you’ve got the AMR Codec to enable you to manage IMS / VoLTE media streams from mobile devices.

Instead of copying and pasting a list of commands to do this, I’ve published a Dockerfile here you can use to build a Docker image, or on a straight Debian Buster machine if you’re working on VMs or Bare Metal if you run the commands from the Dockerfile on the VM / bare metal.

You can find the Dockerfile on my Github here,

Diameter Droplets – The Flow-Description AVP and IPFilterRules

When it comes to setting up dedicated bearers, the Flow-Description AVP is perhaps the most important,

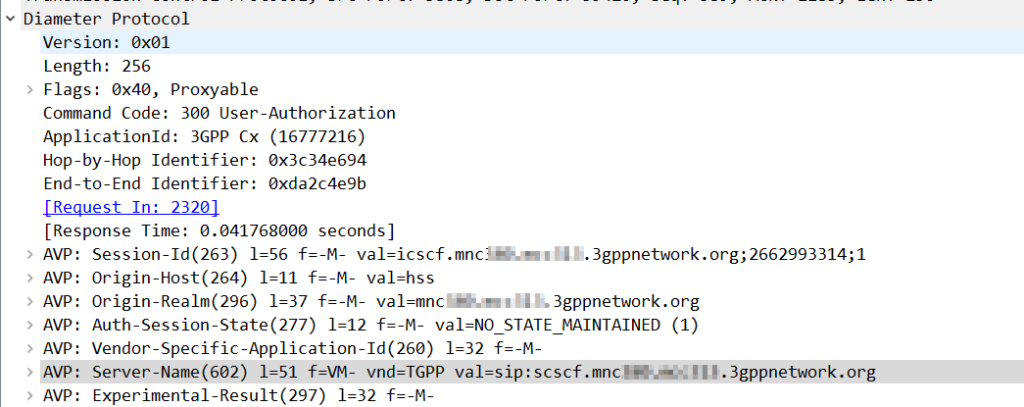
The specially encoded string (IPFilterRule) in the FlowDescription AVP is what our P-GW (Ok, our PCEF) uses to create Traffic Flow Templates to steer certain types of traffic down Dedicated Bearers.

So let’s take a look at how we can lovingly craft an artisanal Flow-Description.

The contents of the AVP are technically not a string, but a IPFilterRule.

IPFilterRules are actually defined in the Diameter Base Protocol (IETF RFC 6733), where we can learn the basics of encoding them,

Which are in turn based loosely off the ipfw utility in BSD.

They take the format:

action dir proto from src to dst

The action is fairly simple, for all our Dedicated Bearer needs, and the Flow-Description AVP, the action is going to be permit. We’re not blocking here.

The direction (dir) in our case is either in or out, from the perspective of the UE.

Next up is the protocol number (proto), as defined by IANA, but chances are you’ll be using 17 (UDP) or 6 (TCP) in most scenarios.

The from value is followed by an IP address with an optional subnet mask in CIDR format, for example from 10.45.0.0/16 would match everything in the 10.45.0.0/16 network.
Following from you can also specify the port you want the rule to apply to, or, a range of ports,
For example to match a single port you could use 10.45.0.0/16 1234 to match anything on port 1234, but we can also specify ranges of ports like 10.45.0.0/16 0 – 4069 or even mix and match lists and single ports, like 10.45.0.0/16 5060, 1000-2000

Protip: using any is the same as 0.0.0.0/0

Like the from, the to is encoded in the same way, with either a single IP, or a subnet, and optional ports specified.

And that’s it!

Keep in mind that Flow-Descriptions are typically sent in pairs as a minimum, as you want to match the traffic into and out of the network (not just one way), but often there can be quite a few sent, in order to match all the possible traffic that needs to be matched that may be across multiple different subnets, etc.

There is an optional Options parameter that allows you to set things like to only apply the rule to open TCP sessions, fragmentation, etc, although I’ve not seen this implemented in the wild.

Example IP filter Rules

permit in 6 from 10.98.254.0/24 5061 to 10.98.0.0/24 5060
permit out 6 from 10.98.254.0/24 5060 to 10.98.0.0/24 5061

permit in 6 from any 80 to 172.16.1.1 80
permit out 6 from 172.16.1.1 80 to any 80

permit in 17 from 10.98.254.0/24 50000-60100 to 10.98.0.0/24 50000-60100
permit out 17 from 10.98.254.0/24 50000-60100 to 10.98.0.0/24 50000-60100

permit in 17 from 10.98.254.0/24 5061, 5064 to 10.98.0.0/24  5061, 5064
permit out 17 from 10.98.254.0/24 5061, 5064 to 10.98.0.0/24  5061, 5064

permit in 17 from 172.16.0.0/16 50000-60100, 5061, 5064 to 172.16.0.0/16  50000-60100, 5061, 5064
permit out 17 from 172.16.0.0/16 50000-60100, 5061, 5064 to 172.16.0.0/16  50000-60100, 5061, 5064

For more info see:

RFC 6773 – Diameter Base Protocol – IP Filter Rule

3GPP TS 29.214 section 5.3.8 Flow-Description AVP

The Surprisingly Complicated world of MO SMS in IMS/VoLTE

Since the beginning of time, SIP has used the 2xx responses to confirm all went OK.

If you thought sending an SMS in a VoLTE/IMS network would see a 2xx OK response and then that’s the end of it, you’d be wrong.

So let’s take a look into sending SMS over VoLTE/IMS networks!

So our story starts with the Subscriber sending an SMS, which generate a SIP MESSAGE.

The Content-Type of this SIP MESSAGE is set to application/vnd.3gpp.sms rather than Text, and that’s because SMS over IMS uses the Short Message Transfer Protocol (SM-TP) inherited from GSM.

The Short Message Transfer Protocol (SM-TP) (Not related to Simple Message Transfer Protocol used in Email clients) is made up of Transfer Protocol Data Units (TPDU) that contain our message information, even though we have the Destination in our SIP headers, it’s again defined in the SM-TP body.

At first this may seem like a bit of duplication, but this allows older SMS Switching Centers (SMSc) to add support for IMS networks without any major changes, just what the SM-TP payload is wrapped up in changes.

SIP MESSAGE Request Body encoded in SM-TP

So back to our SIP MESSAGE request, typed out by the Subscriber, the UE sends this a SIP MESSAGE onto our IMS Network.

The IMS network follows it’s IFCs and routing rules, and makes it to the termination points for SMS traffic – the SMSc.

The SMSc sends back either a 200 OK or a 202 Accepted, and you’d think that’s the end of it, but no.

Our Subscriber still sees “Sending” on the screen, and the SMS is not shown as sent yet.

Instead, when the SMS has been delivered or buffered, relayed, etc, the SMSc generates a new SIP request, (as in new Call-ID / Dialog) with the request type MESSAGE, addressed to the Subscriber.

The payload of this request is another application/vnd.3gpp.sms encoded request body, again, containing SM-TP encoded data.

When the UE receives this, it will then consider the message delivered.

SM-TP encoded Delivery Report

Of course things change slightly when delivery reports are enabled, but that’s another story!

5Gethernet? – Transporting Non-IP data in 5G

I wrote not too long ago about how LTE access is not liked WiFi, after a lot of confusion amongst new Open5Gs users coming to LTE for the first time and expecting it to act like a Layer 2 network.

But 5G brings a new feature that changes that;

PDU Session Type: The type of PDU Session which can be IPv4, IPv6, IPv4v6, Ethernet or Unstructured

ETSI TS 123 501 – System Architecture for the 5G System

No longer are we limited to just IP transport, meaning at long last I can transport my Token Ring traffic over 5G, or in reality, customers can extend Layer 2 networks (Ethernet) over 3GPP technologies, without resorting to overlay networking, and much more importantly, fixed line networks, typically run at Layer 2, can leverage the 5G core architecture.

How does this work?

With TFTs and the N6 interfaces relying on the 5 value tuple with IPs/Ports/Protocol #s to make decisions, transporting Ethernet or Non-IP Data over 5G networks presents a problem.

But with fixed (aka Wireline) networks being able to leverage the 5G core (“Wireline Convergence”), we need a mechanism to handle Ethernet.

For starters in the PDU Session Establishment Request the UE indicates which PDN types, historically this was IPv4/6, but now if supported by the UE, Ethernet or Unstructured are available as PDU types.

We’ll focus on Ethernet as that’s the most defined so far,

Once an Ethernet PDU session has been setup, the N6 interface looks a bit different, for starters how does it know where, or how, to route unstructured traffic?

As far as 3GPP is concerned, that’s your problem:

Regardless of addressing scheme used from the UPF to the DN, the UPF shall be able to map the address used between the UPF and the DN to the PDU Session.

5.6.10.3 Support of Unstructured PDU Session type

In short, the UPF will need to be able to make the routing decisions to support this, and that’s up to the implementer of the UPF.

In the Ethernet scenario, the UPF would need to learn the MAC addresses behind the UE, handle ARP and use this to determine which traffic to send to which UE, encapsulate it into trusty old GTP, fill in the correct TEID and then send it to the gNodeB serving that user (if they are indeed on a RAN not a fixed network).

So where does this leave QoS? Without IPs to apply with TFTs and Packet Filter Sets to, how is this handled? In short, it’s not – Only the default QoS rule exist for a PDU Session of Type Unstructured. The QoS control for Unstructured PDUs is performed at the PDU Session level, meaning you can set the QFI when the PDU session is set up, but not based on traffic through that bearer.

Does this mean 5G RAN can transport Ethernet?

Well, it remains to be seen.

The specifications don’t cover if this is just for wireline scenarios or if it can be used on RAN.

The 5G PDU Creation signaling has a field to indicate if the traffic is Ethernet, but to work over a RAN we would need UE support as well as support on the Core.

And for E-UTRAN?

For the foreseeable future we’re going to be relying on LTE/E-UTRAN as well as 5G. So if you’re mobile with a non-IP PDU, and you enter an area only served by LTE, what happens?

PDU Session types “Ethernet” and “Unstructured” are transferred to EPC as “non-IP” PDN type (when supported by UE and network).

It is assumed that if a UE supports Ethernet PDU Session type and/or Unstructured PDU Session type in 5GS it will also support non-IP PDN type in EPS.

5.17.2 Interworking with EPC

If you were not aware of support in the EPC for Non-IP PDNs, I don’t blame you – So far support the CIoT EPS optimizations were initially for Non-IP PDN type has been for NB-IoT to supporting Non-IP Data Delivery (NIDD) for lightweight LwM2M traffic.

So why is this? Well, it may have to do with WO 2017/032399 Al which is a patent held by Ericsson, regarding “COMMUNICATION OF NON-IP DATA OVER PACKET DATA NETWORKS” which may be restricting wide scale deployment of this,

Open5Gs Logo

Open5Gs Database Schema Change

As Open5Gs has introduced network slicing, which led to a change in the database used,

Alas many users had subscribers provisioned in the old DB schema and no way to migrate the SDM data between the old and new schema,

If you’ve created subscribers on the old schema, and now after the updates your Subscriber Authentication is failing, check out this tool I put together, to migrate your data over.

The Open5Gs Python library I wrote has also been updated to support the new schema.

A very unstable Diameter Routing Agent (DRA) with Kamailio

I’d been trying for some time to get Kamailio acting as a Diameter Routing Agent with mixed success, and eventually got it working, after a few changes to the codebase of the ims_diameter_server module.

It is rather unstable, in that if it fails to dispatch to a Diameter peer, the whole thing comes crumbling down, but incoming Diameter traffic is proxied off to another Diameter peer, and Kamailio even adds an extra AVP.

Having used Kamailio for so long I was really hoping I could work with Kamailio as a DRA as easily as I do for SIP traffic, but it seems the Diameter module still needs a lot more love before it’ll be stable enough and simple enough for everyone to use.

I created a branch containing the fixes I made to make it work, and with an example config for use, but use with caution. It’s a long way from being production-ready, but hopefully in time will evolve.

https://github.com/nickvsnetworking/kamailio/tree/Diameter_Fix

Diff + Wireshark

Supposedly Archimedes once said:

Give me a lever long enough and a fulcrum on which to place it, and I shall move the world.

For me, the equivalent would be:

Give me a packet capture of the problem occurring and a standards document against which to compare it, and I shall debug the networking world.

And if you’re like me, there’s a good chance when things are really not going your way, you roll up your sleeves, break out Wireshark and the standards docs and begin the painstaking process of trying to work out what’s not right.

Today’s problem involved a side by side comparison between a pcap of a known good call, and one which is failing, so I just had to compare the two, which is slow and fairly error-prone,

So I started looking for something to diff PCAPs easily. The data I was working with was ASN.1 encoded so I couldn’t export as text like you can with HTTP or SIP based protocols and compare it that way.

In the end I stumbled across something even better to compare frames from packet captures side by side, with the decoding intact!

Turns out yo ucan copy the values including decoding from within Wireshark, which means you can then just paste the contents into a diff tool (I’m using the fabulous Meld on Linux, but any diff tool will do including diff itself) and off you go, side-by-side comparison.

Select the first packet/frame you’re interested in (or even just the section), expand the subkeys, right click, copy “All Visible items”. This copy contains all the decoded data, not just the raw bytes, which is what makes it so great.

Next paste it into your diff tool of choice, repeat with the one to compare against, scroll past the data you know is going to be different (session IDs, IPs, etc) and ta-da, there’s the differences.

Video of the whole process below:

PyHSS Update – YAML Config Files

One feature I’m pretty excited to share is the addition of a single config file for defining how PyHSS functions,

In the past you’d set variables in the code or comment out sections to change behaviour, which, let’s face it – isn’t great.

Instead the config.yaml file defines the PLMN, transport time (TCP or SCTP), the origin host and realm.

We can also set the logging parameters, SNMP info and the database backend to be used,

HSS Parameters
 hss:
   transport: "SCTP"
   #IP Addresses to bind on (List) - For TCP only the first IP is used, for SCTP all used for Transport (Multihomed).
   bind_ip: ["10.0.1.252"]
 #Port to listen on (Same for TCP & SCTP)
   bind_port: 3868
 #Value to populate as the OriginHost in Diameter responses
   OriginHost: "hss.localdomain"
 #Value to populate as the OriginRealm in Diameter responses
   OriginRealm: "localdomain"
 #Value to populate as the Product name in Diameter responses
   ProductName: "pyHSS"
 #Your Home Mobile Country Code (Used for PLMN calcluation)
   MCC: "999"
   #Your Home Mobile Network Code (Used for PLMN calcluation)
   MNC: "99"
 #Enable GMLC / SLh Interface
   SLh_enabled: True


 logging:
   level: DEBUG
   logfiles:
     hss_logging_file: log/hss.log
     diameter_logging_file: log/diameter.log
     database_logging_file: log/db.log
   log_to_terminal: true

 database:
   mongodb:
     mongodb_server: 127.0.0.1
     mongodb_username: root
     mongodb_password: password
     mongodb_port: 27017

 Stats Parameters
 redis:
   enabled: True
   clear_stats_on_boot: False
   host: localhost
   port: 6379
 snmp:
   port: 1161
   listen_address: 127.0.0.1

Offtopic – HDMI & USB over Twisted Pair

I wanted to be able to use my desktop computer which lives in my office, on the TV in the living room.

Long HDMI cables would involve me climbing around under the house, and making more holes in the walls, and most wireless keyboard/mouse combos wouldn’t reach that far and USB has a limit of 5 meters.

So instead I put together a rather simple solution that I’m quite happy with.

I ran a lot of Cat5 in the house a while ago, and I’ve got 4 Cat5e sockets behind the TV, and a patch panel at my desk.

I purchased online a HDMI over RJ45/Cat5e adapter, and a USB over RJ45/Cat5e adapter online, for about $5 each.

These are passive devices (baluns) meaning they aren’t converting anything to IP or Ethernet for transport.

This means no additional latency (beyond velocity factor of the cable and the distance, but I digress), so it’s not a remote-desktop experience, it’s like sitting in front of a screen, because that’s what it is.

Very happy with the results!

MSISDN Encoding - Brought to you by the letter F

MSISDN Encoding in Diameter AVPs – Brought to you by the letter F

So this one knocked me for six the other day,

MSISDN AVP 700 / vendor ID 10415, used to advertise the subscriber’s MSISDN in signaling.

I formatted the data as an Octet String, with the MSISDN from the database and moved on my merry way.

Not so fast…

The MSISDN AVP is of type OctetString.

This AVP contains an MSISDN, in international number format as described in ITU-T Rec E.164 [8], encoded as a TBCD-string, i.e. digits from 0 through 9 are encoded 0000 to 1001;

1111 is used as a filler when there is an odd number of digits; bits 8 to 5 of octet n encode digit 2n; bits 4 to 1 of octet n encode digit 2(n-1)+1.

ETSI TS 129 329 / 6.3.2 MSISDN AVP

Come again?

In practice this means if you have an odd lengthed MSISDN value, we need to add some padding to round it out to an even-lengthed value.

This padding happens between the last and second last digit of the MSISDN (because if we added it at the start we’d break the Country Code, etc) and as MSISDNs are variable length subscriber numbers.

1111 in octet string is best known as the letter F,

Not that complicated, just kind of confusing.

How AT&T tried (and failed) at mmWave Deployments the 1960s before 5G

So this is the story of how in the 1960s AT&T’s Bell Labs bet on millimeter waves being the communications medium of the future, 60 years before 5G’s millimeter wave hype.

While it’s technically autumn, I just finished my summer Telco reading list, which included “The Idea Factory: Bell Labs and the Great Age of American Innovation” by Jon Gertner, which featured this quote:

By the early 1960s, Bell Labs executives had concluded that millimeter waves would serve as the communications medium of the future.

The Idea Factory: Bell Labs and the Great Age of American Innovation

AT&T’s Bell Labs were working with millimeter waves aka “mmWave” in 5G speak, way back in the 1960s, but using waveguides instead of air as the transmission medium.

AT&T saw the vast amounts of bandwidth available in these bands, and were keen to utilize it. So does history repeat? Are there lessons in here about cursed mmWave bands?

At the time, AT&T’s Long Lines network operated a vast point-to-point Microwave network, spanning across the United States. It operated from 3.7Ghz to 4.2Ghz capacity planners and engineers knew, even with the best multiplexing, you were limited to how many channels you could cram into 500Mhz of space, so Bell Labs started looking for solutions.

Almost from the first, however, the possibility of obtaining low attenuations from the use of circular-electric waves, carrying with it, at the same time, the possibility of extremely high frequencies and accordingly vastly wider bands of frequencies appeared as a fabulous El Dorado always beckoning us onward.

G. C. Southworth – Researcher at Bell Labs – 1962

Initially Bell Labs researchers looked at higher frequencies for these wireless links, but after experimenting with using centimeter wavelengths through the air and the issues with attenuation from rain and water vapour, more research was done and Bell Labs decided to use waveguides as the transmission medium for these millimeter wave transmissions, instead of transmitting through the air.

An exploratory development effort was begun in 1959 on a system utilizing 2-inch waveguide and travelling-wave-tube repeater, but was abandoned in 1962 because of TWT cost and reliability problems and because the capacity exceeded then-current Bell System needs.

BSTJ 56: 10. December 1977: WT4 Millimeter Waveguide System: Introduction

Thanks to the recent development of IMPATT diodes and Solid-State devices, it was not abandoned for long, and research was picked up again in 1962. At the time Bell Labs didn’t need the additional capacity, nor did they know when it would be commercially viable to start using millimeter waveguide in the field, but like the 5G operators today, Bell Labs staff had seen the massive amounts of bandwidth available at these higher frequencies, and were looking to exploit it.

The idea at Bell Labs was to send information through such waves not by wires or broadcast towers but by means of the circular waveguide, which had been developed down in Holmdel. “A specially designed hollow pipe,” as Fisk defined it, the waveguide was just a few inches in diameter, and lined inside with a special material that would allow it to carry very high-frequency millimeter radio wave signals.

The Idea Factory: Bell Labs and the Great Age of American Innovation

Unfortunately the physical problems of running waveguides in pits and pipes across the country were immense. After lots of research on novel shapes for Waveguides, bending of waveguides and underground jointing of waveguides Bell Labs staff settled on just digging new trenches for the waveguide and not reusing anything.

Around the same time the first MASERS were coming onto the market, and light (free space optics) was being considered instead of electrical energy as a transmission medium. Test shooting lasers through the air highlighted the high optic losses in air, showing this wasn’t practical as a transmission method. While optic fibres existed at the time their losses were so high as to make transmitting anything over a few meters impractical.

All the millimeter wave transmission in waveguide research culminated in the creation of the WT4 system, in the late 1970s.

A 60mm waveguide was used

Advertisement from the April 12, 1971 issue of Time magazine

Using two levels of Phase-Shift keying they were able to provide 238k concurrent calls of capacity, which they calculated could be doubled by moving to four levels of PSK.

On a 14km test system (Bell labs used SI units), they calculated they had the ability to carry almost half a million concurrent voice calls, and with 274 Mbps of bandwidth (DS-4), which for the 1970s was no mean feat.

AT&T had historically installed cables, but unlike cables, Waveguides can’t bend, so are more akin to installing water or gas pipes.

This meant the installation of the waveguides into the field leveraged processes from the pipeline industry that were adopted for installation of the waveguides.

“Push sites” selected where a steel sheath (which essentially equated to lengths of hollow steel pipe) could be pushed in under the surface of the earth, with extra pipe welded onto the end as it was pushed along.

This created a clear, straight, conduit for the waveguide to be installed. Due to the fragility of the waveguides themselves, they were laid within the pipe on roller bearings to support the waveguide and to help it slide inside the steel sheath.

In tests AT&T were pushing almost 2.5 Km of waveguide in from one site, with extra lengths of waveguide (9m lengths) being joined by the special “waveguide splicing vehicle” and pushed into the sheath.

Repeater stations were equally tricky,
Luckily the WT4 system only required repeater stations at intervals up to 60Km, although when going over hilly terrain, the bends in the waveguide increased losses, so would require repeaters at shorter intervals (~50Km).
The inability to bend the cables required a tunnel under each repeater station, through which the waveguides would run, with the repeaters tapping off the waveguides below, via a network of filters.
Like the microwave network, some of the repeater stations were equipped to add/drop channels, allowing local traffic to be added/dropped off mid-span.
The system was using the new (at the time) Solid State components, but to increase reliability the electronics were encased in airtight dry nitrogen enclosures.

As the WT4 system and its finicky waveguides was being perfected in the 1970s, Corning, a company then known for glass manufacturing, was able to demonstrate that by removing impurities in the glass, optical fibres could be produced with losses of 17 dB per kilometer. Shortly after they got it down to 4 dB per kilometer, and these values kept falling. While early fibre optics were not without their challenges, fibre could be installed in existing conduits, without specialised pipe-pushing and welding equipment, and at a much lower cost per meter.

While WT4 provided bandwidth in numbers unseen before, it’s high cost to deploy and many limitations saw it fade away into the annals of history.

Even in the 1960s Bell Labs staff knew the case for mmWave wasn’t yet financially viable, but built it for a future that didn’t come the way they expected.

So what can this 60 year old tale of engineering teach us?

Bell Labs were pinning their hopes on mmWave to provide limitless bandwidth – and it could, but was faced the ultimate issue of not being financially viable. Here we are 60 years later, and again, many telcos are also pinning a lot of hope on the higher bands.

As was the case in the the 1960s, there is no doubt the bandwidth available for 5G in mmWave is huge (thanks Shannon–Hartley theorem), but it comes with equally vexing challenges to do with propagation and cost of the rollout.

Only time will tell if 5G’s mmWave endeavours end up seeing wide scale adoption.

Being mean to Mikrotiks – Pushing SMB File Share

I’d tried in the past to use the USB port on the Mikrotik, an external HDD and the SMB server in RouterOS, to act as a simple NAS for sharing files on the home network. And the performance was terrible.

This is because the device is a Router. Not a NAS (duh). And everything I later read online confirmed that yes, this is a router, not a NAS so stop trying.

But I recently got a new Mikrotik CRS109, so now I have a new Mikrotik, how bad is the SMB file share performance?

To test this I’ve got a USB drive with some files on it, an old Mikrotik RB915G and the new Mikrotik CRS109-8G-1S-2HnD-IN, and compared the time it takes to download a file between the two.

Mikrotik Routerboard RB951G

While pulling a 2Gb file of random data from a FAT formatted flash drive, I achieved a consistent 1.9MB/s (15.2 Mb/s)

nick@oldfaithful:~$ smbget smb://10.0.1.1/share1/2Gb_file.bin
 Password for [nick] connecting to //share1/10.0.1.1: 
 Using workgroup WORKGROUP, user nick
 smb://10.0.1.1/share1/2Gb_file.bin                                                                                                                                              
 Downloaded 2.07GB in 1123 seconds

Mikrotik CRS109

In terms of transfer speed, a consistent 2.8MB/s (22.4 Mb/s)

nick@oldfaithful:~$ smbget smb://10.0.1.1/share1/2Gb_file.bin
 Password for [nick] connecting to //share1/10.0.1.1: 
 Using workgroup WORKGROUP, user nick
 smb://10.0.1.1/share1/2Gb_file.bin                                              
 Downloaded 2.07GB in 736 seconds

Profiler shows 25% CPU usage on “other”, which drops down as soon as the file transfers stop,

So better, but still not a NAS (duh).

The Verdict

Still not a NAS. So stop trying to use it as a NAS.

As my download speed is faster than 22Mbps I’d just be better to use cloud storage.

PyHSS Update – SCTP Support

Pleased to announce that PyHSS now supports SCTP for transport.
If you’re not already aware SCTP is the surprisingly attractive cousin of TCP, that addresses head of line blocking and enables multi-homing,

The fantastic PySCTP library from P1sec made adding this feature a snap. If you’re looking to add SCTP to a Python project, it’s surprisingly easy,

A seperate server (hss_sctp.py) is run to handle SCTP connections, and if you’re looking for Multihoming, we got you dawg – Just edit the config file and set the bind_ip list to include each of your IPs to multi home listen on.

And the call was coming from… INSIDE THE HOUSE. A look at finding UE Locations in LTE

Opening Tirade

Ok, admittedly I haven’t actually seen “When a Stranger Calls”, or the less popular sequel “When a stranger Redials” (Ok may have made the last one up).

But the premise (as I read Wikipedia) is that the babysitter gets the call on the landline, and the police trace the call as originating from the landline.

But you can’t phone yourself, that’s not how local loops work – When the murderer goes off hook it loops the circuit, which busys it. You could apply ring current to the line I guess externally but unless our murder has a Ring generator or has setup a PBX inside the house, the call probably isn’t coming from inside the house.
On Topic – The GMLC

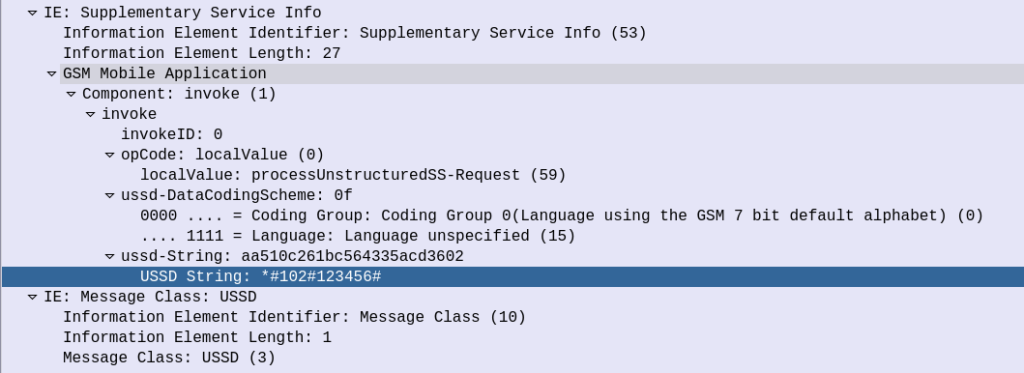
The GMLC (Gateway Mobile Location Centre) is a central server that’s used to locate subscribers within the network on different RATs (GSM/UMTS/LTE/NR).

The GMLC typically has interfaces to each of the radio access technologies, there is a link between the GMLC and the CS network elements (used for GSM/UMTS) such as the HLR, MSC & SGSN via Lh & Lg interfaces, and a link to the PS network elements (LTE/NR) via Diameter based SLh and SLg interfaces with the MME and HSS.

The GMLC’s tentacles run out to each of these network elements so it can query them as to a subscriber’s location,

LTE Call Flow

To find a subscriber’s location in LTE Diameter based signaling is used, to query the MME which in turn queries, the eNodeB to find the location.

But which MME to query?

The SLh Diameter interface is used to query the HSS to find out which MME is serving a particular Subscriber (identified by IMSI or MSISDN).

The LCS-Routing-Info-Request is sent by the GMLC to the HSS with the subscriber identifier, and the LCS-Routing-Info-Response is returned by the HSS to the GMLC with the details of the MME serving the subscriber.

Now we’ve got the serving MME, we can use the SLg Diameter interface to query the MME to the location of that particular subscriber.

The MME can report locations to the GMLC periodically, or the GMLC can request the MME provide a location at that point.
For the GMLC to request a subscriber’s current location a Provide-Location-Request is set by the GMLC to the MME with the subscriber’s IMSI, and the MME responds after querying the eNodeB and optionally the UE, with the location info in the Provide-Location-Response.

(I’m in the process of adding support for these interfaces to PyHSS and all going well will release some software shortly to act at a GMLC so people can use this.)

Finding the actual Location

There are a few different ways the actual location of the UE is determined,

At the most basic level, Cell Global Identity (CGI) gives the identity of the eNodeB serving a user.
If you’ve got a 3 sector site each sector typically has its own Cell Global Identity, so you can determine to a certain extent, with the known radiation pattern, bearing and location of the sector, in which direction a subscriber is. This happens on the network side and doesn’t require any input from the UE.
But if we query the UE’s signal strength, this can then be combined with existing RF models and the signal strength reported by the UE to further pinpoint the user with a bit more accuracy. (Uplink and downlink cell coverage based positioning methods)
Barometric pressure and humidity can also be reported by the base station as these factors will impact resulting signal strengths.

Timing Advance (TA) and Time of Arrival (TOA) both rely on timing signals to/from a UE to determine it’s distance from the eNodeB. If the UE is only served by a single cell this gives you a distance from the cell and potentially an angle inside which the subscriber is. This becomes far more useful with 3 or more eNodeBs in working range of the UE, where you can “triangulate” the UE’s location. This part happens on the network side with no interaction with the UE.
If the UE supports it, EUTRAN can uses Enhanced Observed Time Difference (E-OTD) positioning method, which does TOD calcuation does this in conjunction with the UE.

GPS Assisted (A-GPS) positioning gives good accuracy but requires the devices to get it’s current location using the GPS, which isn’t part of the baseband typically, so isn’t commonly implimented.

Uplink Time Difference of Arrival (UTDOA) can also be used, which is done by the network.

So why do we need to get Subscriber Locations?

The first (and most noble) use case that springs to mind is finding the location of a subscriber making a call to emergency services. Often upon calling an emergency services number the GMLC is triggered to get the subscriber’s location in case the call is cut off, battery dies, etc.

But GMLCs can also be used for lots of other purposes, marketing purposes (track a user’s location and send targeted ads), surveillance (track movements of people) and network analytics (look at subscriber movement / behavior in a specific area for capacity planning).

Different countries have different laws regulating access to the subscriber location functions.

Hack to disable Location Reporting on Mobile Networks

If you’re wondering how you can disable this functionality, you can try the below hack to ensure that your phone does not report your location.

  1. Press the power button on your phone
  2. Turn it off

In reality, no magic super stealth SIM cards, special phones or fancy firmware will prevent the GMLC from finding your location.
So far none of the “privacy” products I’ve looked at have actually done anything special at the Baseband level. Most are just snakeoil.

For as long as your device is connected to the network, the passive ways of determining location, such as Uplink Time Difference of Arrival (UTDOA) and the CGI are going to report your location.

PyHSS New Features

Thanks to some recent developments, PyHSS has had a major overhaul recently, and is getting better than ever,

Some features that are almost ready for public release are:

Config File

Instead of having everything defined all over the place a single YAML config file is used to define how the HSS should function.

SCTP Support

No longer just limited to TCP, PyHSS now supports SCTP as well for transport,

SLh Interface for Location Services

So the GMLC can query the HSS as to the serving MME of a subscriber.

Additional Database Backends (MSSQL & MySQL)

No longer limited to just MongoDB, simple functions to add additional backends too and flexible enough to meet your existing database schema.

All these features will be merged into the mainline soon, and documented even sooner. I’ll share some posts on each of these features as I go.