This is part of a series of posts looking into SS7 and Sigtran networks. We cover some basic theory and then get into the weeds with GNS3 based labs where we will build real SS7/Sigtran based networks and use them to carry traffic.
In our last post we talked about moving MTP2 onto IP and the options available.
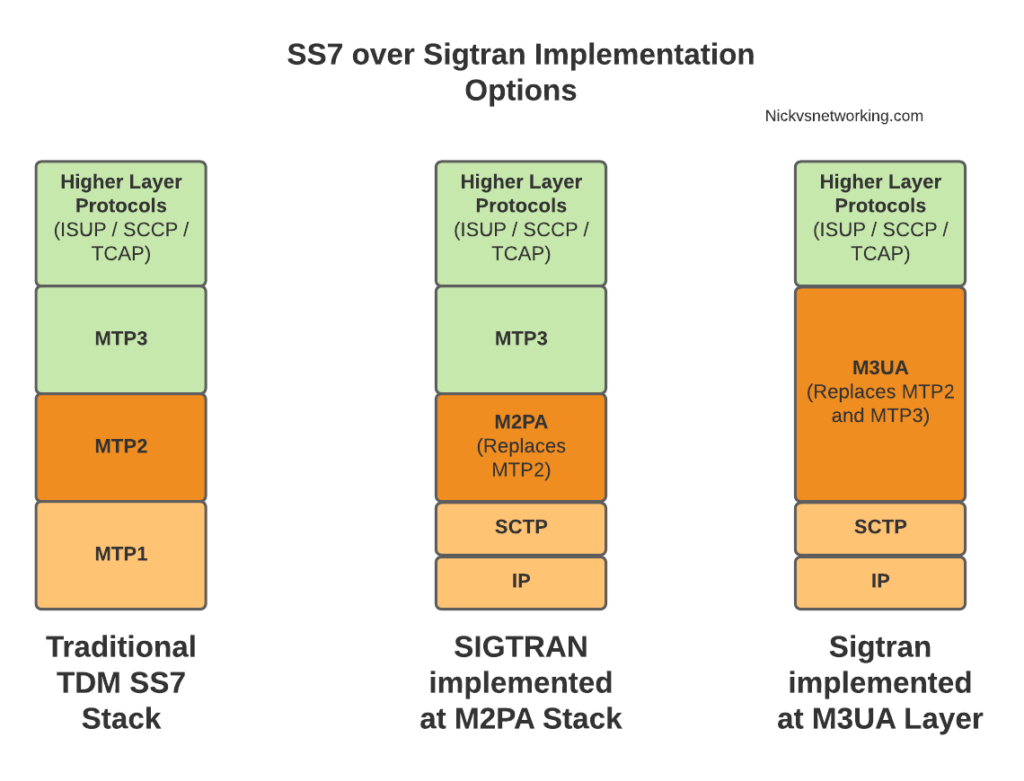
When we split the SS7 stack onto IP we don’t need to do this at the Data Link Layer, we can instead do it higher up the stack. This is where we introduce M3UA.
MTP Level 3 User Adaptation Layer – M3UA replaces MTP3 with an IP based equivilent.
This is different to how we’d handle it with M2UA or M2PA where MTP3 remained unchanged, when you deploy M3UA links, there is no MTP3 anymore – it’s replaced with an IP based protocol transported via SCTP designed to do the same role as MTP3 but over IP – That protocol is M3UA.
This means the roles handled in MTP3 such as managing which available point codes are reachable over which linksets, failover, load sharing and reporting are all now handled by the M3UA protocol, because we loose the ability to just rely on MTP3 to do those things like we did when using lower layer protocols like M2PA or MTP2.
So what do you need to know to use M3UA?
Well, the first concept we need to wrap our head around is that we no longer have linksets or pointcode routes (We do, but they’re different) but instead have Application Servers, Application Server Processes and Routing Contexts.
If you’re following along at home and you want to hook your M3UA compatible AS into the Cisco ITP STP, I’ll be including the commands as we go along. The first step on the Cisco (assuming you’ve already defined the basic SS7 config) is to create a local M3UA instance:
cs7 m3ua 2905
 local-ip 10.179.2.154
With that out of the way, let’s cover ASPs & ASs (hehe – Ass).
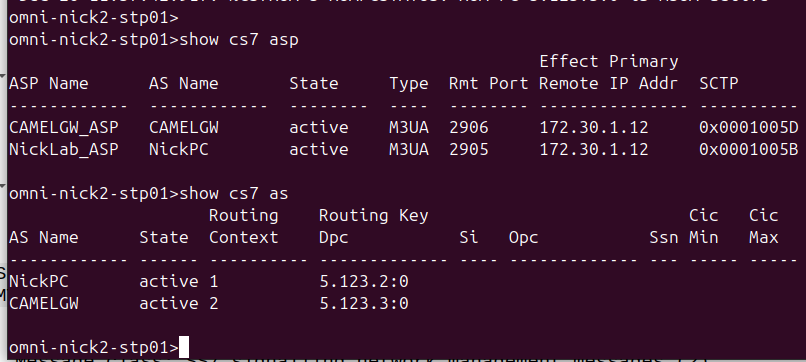
You can think of the Application Server Process (ASP) as the client end of the “link set” of our virtual SS7 stack, it handles getting the SCTP association up, what IPs, ports and SCTP parameters are needed, and listens and communicates based on that, here’s an example on the Cisco ITP:
cs7 asp NickLab_ASP 2905 2905 m3ua
 remote-ip 10.0.1.252
 remote-ip 172.30.1.12
The ASP connects to a Signaling Gateway (In practical terms this is an STP).
That’s simple enough and now we can do our SCTP handshake, but nothing is going to get routed without introducing the Application Server (AS) itself, which is where we configure the routing and link to 1 or more ASPs and how we want to share traffic among them.
Point codes are still used in M3UA for sending traffic from an M3UA AS but it’s not what controls the routing to an AS.
That probably sounds confusing, I send traffic based on point code, but the traffic does’t get to the M3UA AS via point code? What gives?
Well, first we’ve got to introduce the Routing Context in M3UA.
Routing Contexts define what destinations are served by this AS.
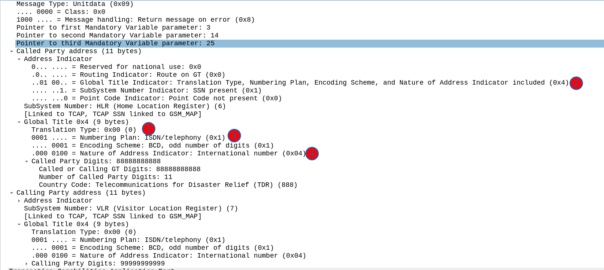
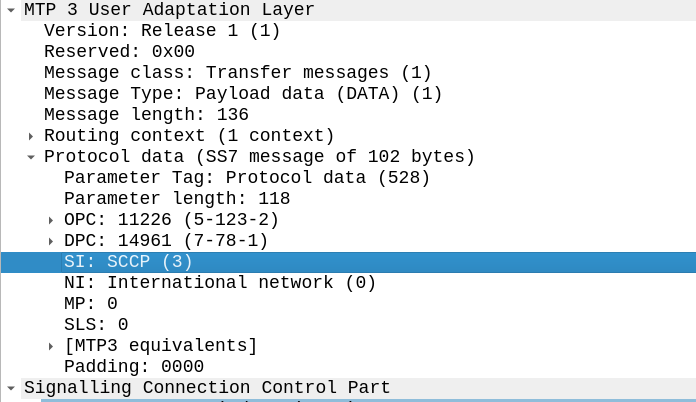
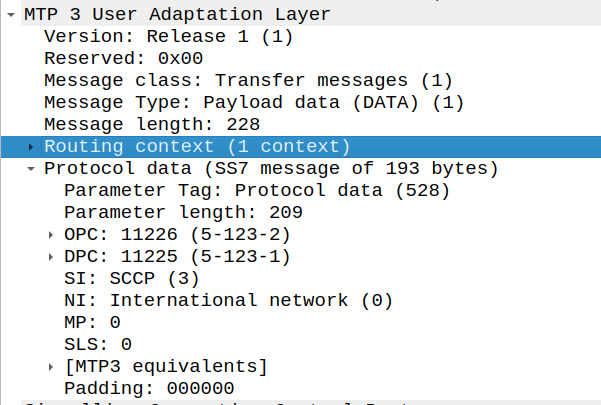
As an example, on our STP we’ll define a Routing Context inside the ITP inside the AS section, in this example we’re creating Routing Key 1 which will handle traffic to the point code 5.123.2, but we could equally define a routing-key for a given Global Title address too.
cs7 instance 0 as NickPC m3ua
 routing-key 1 5.123.2
 asp NickLab_ASP
 traffic-mode broadcast
Notice we didn’t define Routing Key X -> Point Code Y -> ASP Z ? That’s because we may have one or more ASPs associated with this (remember ASPs are kinda like Linksets).
For example the Point Code for an HLR might have multiple ASPs behind it, with traffic-mode loadshare to load balance the requests among all the HLRs.
So what does it look like to bring this up? Let’s take a look at a link coming up.
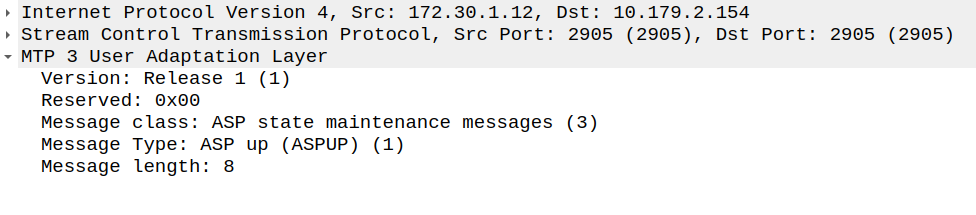
Under the hood we’ve got the SCTP connection / handshake like normal, then our ASP sends an ASPUP (ASP is in state “up”) message to the Signaling Gateway (STP).
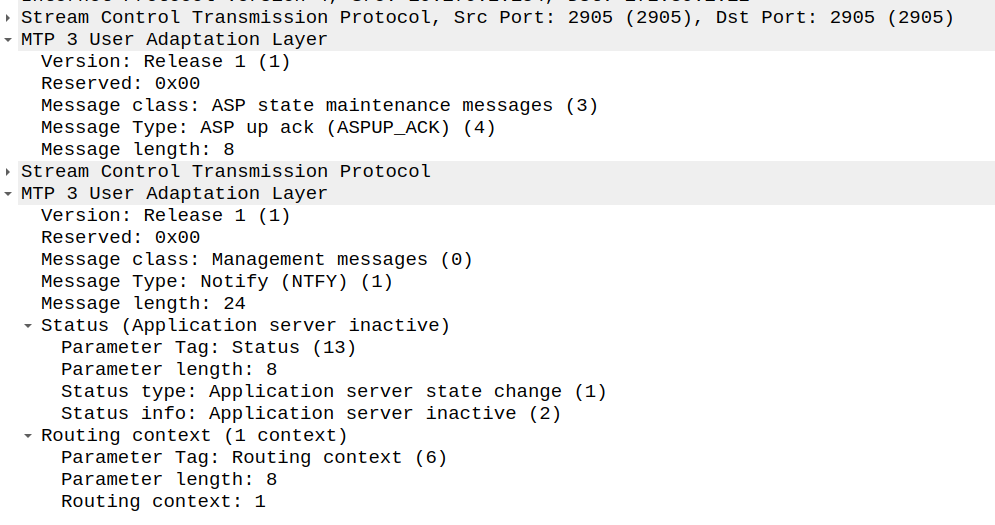
Now our ASP has told the Signaling Gateway it’s there, so our Signaling Gateway returns an ASPUP_ACK to confirm it’s got the message and the current AS state is inactive.
And with that our ASP is in “an up state, “inactive” state; it’s connected to the STP, but without any ASes associated with our ASP, it’s akin to having link layer but nothing else.

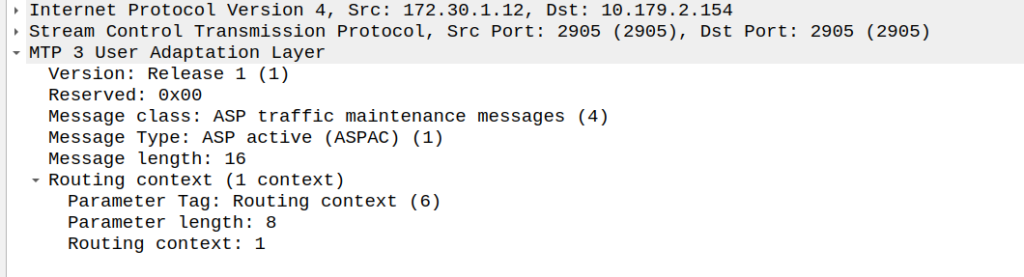
So next our ASP will send an ASPAC (ASP Active) message for the given routing contexts the AS serves, in this case, Routing Context 1.
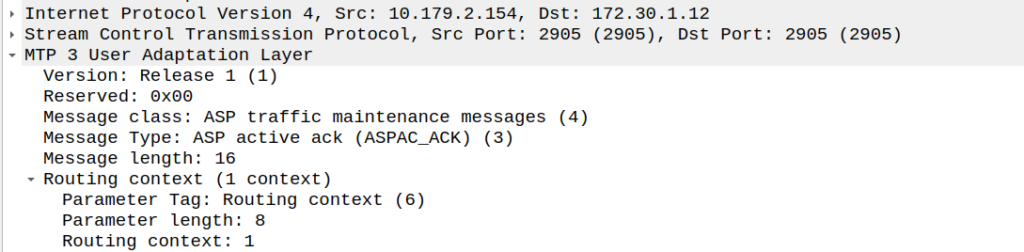
And with that, the Signaling Gateway (STP) send back an an ASPAC_ACK (ASP Active Ack) to confirm it’s got it, and the state changes.
Because of how MTP3 worked advertising available point codes, the SG (STP) needs to tell the AS/ASP how it sees the world and the state of the connection.
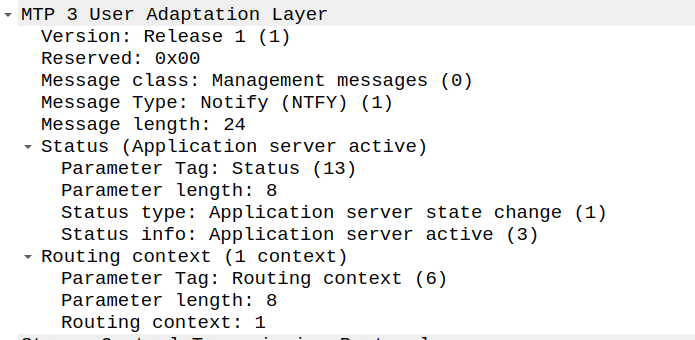
This is done with a NTFY (Notify) message from the STP/SG to indicate the state has changed to active, and what destinations are reachable, and at this point, we’re good to start handling traffic for that Routing Context.
And with that, we can start handling M3UA traffic.
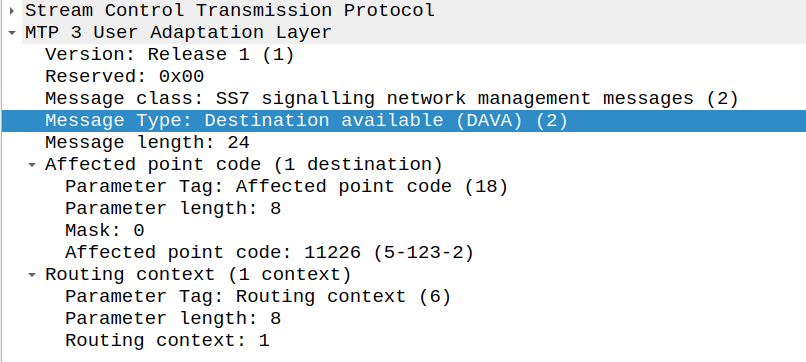
There’s only one more key dialog to wrap your heads around that’s the DAVA and DUNA messages.
DAVA is Destination Available, and DUNA is Destination Unavailable. The SG (STP) will send these messages to ASP/AS every time the reachability of a neighboring point code changes.
That’s the basics covered, I’m in the process of developing an HLR (Running with MAP/TCAP/SCCP/M3UA) extension for PyHSS, which in the future will allow us to experiment with more M3UA endpoints.