
We’ve touched a tiny bit on basic database functionality in Kamailio, using MySQL to store User Data for authentication, ACLs or Dispatcher entries.
But with all those we were using Databases to load the config / dynamic data for a module.
We’ll build upon that, to connect to a Database that we can INSERT, UPDATE and SELECT data from within the dialplan.
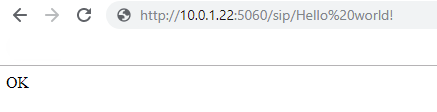
For today’s example we’ll lookup the To address from a SIP INVITE and send back
Heads Up
There’s a lot of different use cases for reading and writing data from a database, but Kamailio also has a lot of native modules that handle this better, for example:
- You might want to store a record of each INVITE and BYE you recieve for accounting, a better option is to use the Accounting Module in Kamailio.
- You might want to authenticate user’s based on ACLs stored in a database, a better option would be to use Permissions Module.
- User authentication info is best handled by Auth DB module.
- The Dialplan module handles number translation really well and is lightning quick.
Just keep this in mind before jumping in that a lot of use cases have already been covered by a Kamailio module.
The Architecture
For today’s example we’ll be using MySQL as the database backend (db_mysl), but the db_mysql module simply connects us to a database, a bit like ODBC.
The real MVP is the SQLops module, that does all the heavy lifting by running the queries and managing the responses.
The majority of this config would work fine for other database backends, like PostGres, MongoDB, Oracle, etc.
I’ll demonstrate this same setup using different database backends in future posts.
MySQL Database
Before we get too excited we’ll need to setup a database to query. I’ll create a database called dyamic_routing with a table called routing storing source / destinations.
CREATE DATABASEphonebook; USEphonebook; CREATE TABLEcontacts(idINT NOT NULL AUTO_INCREMENT PRIMARY KEY,sourceTEXT,nameTEXT ); INSERT INTOcontactsVALUES (1, '200', 'Nick Deskphone');
I’ll setup a MySQL user to INSERT/UPDATE/SELECT data from the MySQL database the normal way.
Modparam
The module parameters for connecting to a database backend are fairly straight forward, but we’ll go into a bit of depth here to drive home the point.
# ----- SQL params -----
loadmodule "db_mysql.so"
loadmodule "sqlops.so"

#Create a new MySQL database connection called contacts_db
modparam("sqlops","sqlcon","contacts_db=>mysql://root:youshouldntrealluseroot@localhost/phonebook")

#Set timeouts for MySQL Connections
modparam("db_mysql", "ping_interval", 60)
modparam("db_mysql", "auto_reconnect", 1)
modparam("db_mysql", "timeout_interval", 2)
First off we load the two modules we need for this, db_mysql and sqlops. This is fairly self explanatory, if we were using db_postgres, db_mongodb or even db_text we’d load them instead of db_mysql.
The sqlops “sqlcon” modparam is where we define our MySQL database connection.
In this case we create a new database connection object called contacts_db– We can have connections to multiple databases, hence requiring a name.
The MySQL URL is fairly straightforward, database type, username, password, host and database:
mysql://root:password@localhost/phonebook
In production obviously you shouldn’t use root as the user account to log into the database, and lock it down to only the source IP of your Kamailio instance and with only the permissions it needs. (If it’s just selecting data there’s no need for GRANT…)
Basic Query
Now we’ve created a database connection it’s time to start using it.
request_route {
        if(method=="INVITE"){
                xlog("New request to $tU");

                #Query database object called "contacts_db", run the below query and store the output to a variable called result_sql
                sql_query("contacts_db", "select * from contacts;", "result_sql");

                #output number of rows in database returned
                xlog("number of rows in table is $dbr(result_sql=>rows)\n");
}
}
If the method is an INVITE we’ll query the database object called “contacts_db” to run the query select * from contacts;
We’ll then output the number of rows in the table to xlog.
The query actually happens in the sql_query() command, which takes the name of the database object ( contacts_db ), the query itself ( select * from contacts; ) and stores it into a variable called result_sql.
Finally xlog references the variable we stored our result in (result_sql) using the $dbr() handler to output the number of rows in the table.
If you save this and send an INVITE to any destination and watch the syslog you should see something along the lines of this:
/usr/sbin/kamailio[7815]: ERROR: : New request to 200
/usr/sbin/kamailio[7815]: ERROR: <script>: number of rows in table is 1
This means we’ve got a connection to the database and we can run queries.
Accessing the Output
Now we’ve got the data back from the database and stored it in result_sql we probably want to do something with the outputted data.
By wrapping the result_sql variable in the $dbr() tags we can access it’s jucy insides, let’s take a look:
                #output number of columns
                xlog("Result has $dbr(result_sql=>cols) Columns");
                #output number of rows
                xlog("Result has $dbr(result_sql=>rows) rows");
                #output contents of row 0, column 2
                xlog("Contents of row 0 col 2 is $dbr(result_sql=>[0,2]) ");
                #output name of column 2
                xlog("name of column 2 is $dbr(result_sql=>colname[2]) ");
If we add this after our last xlog line, restart Kamailio and view syslog it should look something like this:
/usr/sbin/kamailio[8249]: ERROR: <script>: New request to 200
/usr/sbin/kamailio[8249]: ERROR: <script>: number of rows in table is 1
/usr/sbin/kamailio[8249]: ERROR: <script>: Result has 3 Columns
/usr/sbin/kamailio[8249]: ERROR: <script>: Result has 1 rows
/usr/sbin/kamailio[8249]: ERROR: <script>: Contents of row 0 column 2 is Nick Deskphone
Now we can see the data in the result we’ll start to refine this down a bit, we’ll begin by limiting the SQL query to search for the called number.
For this we’ll update the sql_query(); function to:
sql_query("contacts_db", "select * from contacts where source = $tU;", "result_sql");This will include the the To URI Username pseudo variable in our query, so will only return results if the number we dial has one or more matching “source” entries in the database.
If we dial 200 the query that’s actually run against the database will look like this:
select * from contacts where source = '200';
Now once we save and try again our traffic will look the same, except it’ll only return data if we dial 200, if we dial 201 the SQL server won’t have any matching results to return:
/usr/sbin/kamailio[9069]: ERROR: : New request from 2029
/usr/sbin/kamailio[9069]: ERROR: number of rows in table is 0
/usr/sbin/kamailio[9069]: ERROR: Result has 0 Columns
So that’s all well and good but we haven’t really got the data easily yet, while we’re outputting the contents of row 0 col 2 to syslog, it’s not going to handle multiple results being returned, or 0 results being returned, so we need a better way to handle this.
We’ll use a for loop to loop through all the results returned and output the second column of each (the “name” field in the database).
                #Loop through results
                #Create variable i to use as the counter
                $var(i) = 0;
                #While the contents of row i, position 2, is not null:
                while ($dbr(result_sql=>[$var(i),2]) != $null) {
                        #Output row i, position 2 (name)
                        xlog("name is $dbr(result_sql=>[$var(i),2])");
                        #increment i by 1
                        $var(i) = $var(i) + 1;
                }
So while the contents of row i, position 2, is not null, we’ll output the contents and increment i to get the next row in the database until there are none left.
Now we can give our code a bit of a clean up:
request_route {
        if(method=="INVITE"){
                xlog("New request from $tU");

                #Query database object called "contacts_db", run the below query and store the output to a variable called result_sql
                sql_query("contacts_db", "select * from contacts where source = $tU;", "result_sql");

                #Loop through results
                #Create variable i to use as the counter
                $var(i) = 0;
                #While the contents of row i, position 2, is not null:
                while ($dbr(result_sql=>[$var(i),2]) != $null) {
                        #Output row i, position 2 (name)
                        xlog("name $dbr(result_sql=>[$var(i),2])");
                        #increment i by 1
                        $var(i) = $var(i) + 1;
                }


        }
        if(method=="REGISTER"){ sl_reply('200', 'OK'); }
}
I’ve removed many of our xlog entries we put in for debugging and also added a handler to handle REGISTER requests to keep my IP phone happy.
Now if we make a call to number 200:
/usr/sbin/kamailio[9686]: ERROR: New request from 200
/usr/sbin/kamailio[9686]: ERROR: name Nick Deskphone
And for comparison a call to 201 (no matching database entry):
/usr/sbin/kamailio[9686]: ERROR: New request from 200
Using the Resulting Output
Now we’ve got access to the data from the database let’s do something with it.
Inside our loop we’ll send a reply to the SIP requester, with a 410 “Gone” response with the body containing the data returned from the database:
                        #Loop through results
                        #Create variable i to use as the counter
                        $var(i) = 0;
                        #While the contents of row i, position 2, is not null:
                        while ($dbr(result_sql=>[$var(i),2]) != $null) {
                                #Output row i, position 2 (name)
                                xlog("name $dbr(result_sql=>[$var(i),2])");
                                $var(name) = $dbr(result_sql=>[$var(i),2]);
                                #increment i by 1
                                $var(i) = $var(i) + 1;

                                #Reply with a 410 (User Gone) response with the name returned from the database
                                sl_reply("410", "Sorry $var(name) has gone home");
                                exit;
                        }
Now calls to 200 will get the message “Sorry Nick desk phone has gone home”.

Lastly we probably want to only loop through the output if there’s more than one row returned from the database, so we’ll put the looping code in an if statement that evaluates if the number of returned rows from the database is 1 or more, and if not just send a 404 response:
                #if one or more results are returned from the database
                if($dbr(result_sql=>rows)>0){

                        #Loop through results
                        #Create variable i to use as the counter
                        $var(i) = 0;
                        #While the contents of row i, position 2, is not null:
                        while ($dbr(result_sql=>[$var(i),2]) != $null) {
                                #Output row i, position 2 (name)
                                xlog("name $dbr(result_sql=>[$var(i),2])");
                                $var(name) = $dbr(result_sql=>[$var(i),2]);
                                #increment i by 1
                                $var(i) = $var(i) + 1;

                                #Reply with a 410 (User Gone) response with the name returned from the database
                                sl_reply("410", "Sorry $var(name) has gone home");
                                exit;
                        }
                }else{
                        #if 0 results are returned from database
                        sl_reply("404", "Never heard of them");
                }
INSERT, DELETE, UPDATE, etc
Although we only covered SELECT, queries that don’t return data like an INSERT, UPDATE, DELETE etc, can all be run the same way but we just don’t need to worry about managing the returned data.
For example we could delete a record using:
sql_query("contacts_db", "delete * from contacts where source = $tU;");We don’t even need to store the output unless we need to.
Summary
Hopefully you’ve now got an idea how to query data from a database and view / manipulated the returned data.
As always I’ve posted my running source code for you to play with on GitHub, and I’ll do a few follow up posts on other database backends you may want to use other than MySQL.


