Monthly Archives: September 2019

End of ISDN in Australia

Starting from today, Australia’s largest carrier will begin disconnecting ISDN services, and all will be shut off entirely by 2022.

When I started working in the industry the question wasn’t how many SIP Channels you wanted, but rather PRI or BRI when it came to trunk lines.

We’d use ISDN dial up to remotely administer systems, and had a bulky ISDN PRI test set for testing lines and BERT.

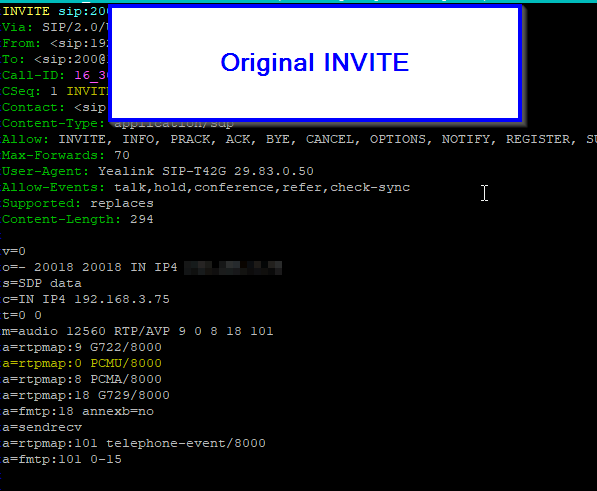
ISDN Crossovers, QSIG, gateways, ISUP, Bit Error Rate Testing, loopbacks, clock slips, cause code 16, enblock dialing – all things I’m not likely to need to know anymore.

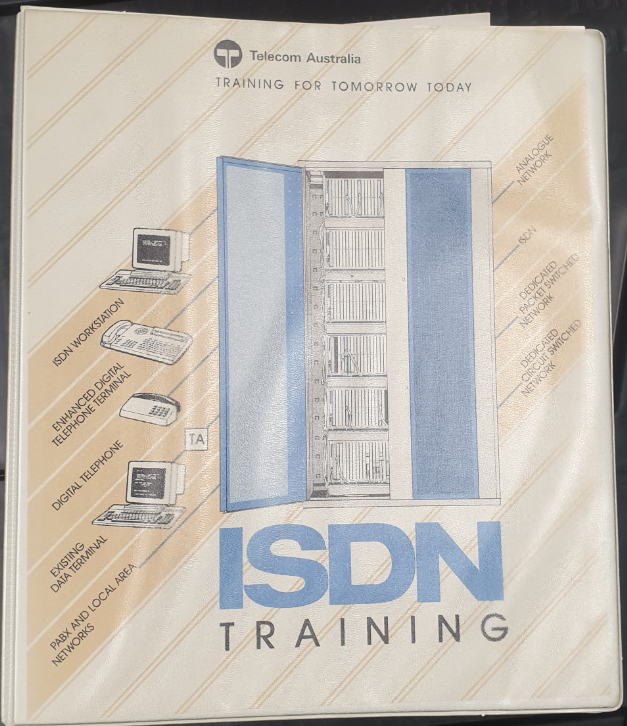
Since ISDN was first rolled out in Australia just over 3 decades ago, to it being switched off from today onward, ISDN has been crazily reliable, and as much as it pains me to admit it, it has availability stats any SIP provider would be envious of.

As the market evolved over the years the smaller telcos realized using ISDN-SIP gateways made by AudioCodes, Epigy, Sangoma & Quintum was a cheap way to provide a drop in replacement for those expensive Telstra/Optus ISDN services. This generally was a stop gap measure as companies then made the move to straight SIP and stopped paying for the gateway device each month.

And just like that, ISDN was no longer relevant.

So today SIP based VoIP is the clear standard, ISDN fades away, but strangely those POTS lines carry on. Sure they are just VoIP delivered over a carrier grade ATA, but that 48vDC loop of copper with AC ring current, standardized over 120 years ago somehow lives on…

Here’s an article from The Age dated 11 August 1989:

Number may be up for the Telephone

Alexander Graham Bell’s system of sending voices over wires with a varying electrical current started a revolution, then weathered it for 123 years.

In Australia, that unchallenged reign officially ended yesterday with the official beginning of another revolution called integrated services digital networking — ISDN. The telephone has married the computer and gone digital.

The revolution really began late last year when Telecom invited several big companies to try out the communications system that will soon extend its tendrils into our offices and eventually, our homes.

In Canberra’s new National Convention Centre yesterday, the Minister for Telecommunications and Aviation Support, Mrs Kelly, communicated simultaneously via voice, fax and photovideotex on a single telephone line with two senior officers of the Defence Department in an office on the other side of Canberra.

Mr Bell’s telephone could never do that — it does only one job at a time.

With ISDN, any device that speaks or responds to the simple on-off language of computer digital code, or anything that can be rendered in the same code, including the human voice, video images and computer images, can be sent simultaneously on a single ISDN connection.

Each type of information is coded and -addressed in such a way that, at the other end, fax messages go to faxes, voices come out of the telephone and computer images arrive onscreen or on a printer.

The system inaugurated by Mrs Kelly is called ISDN Macro-link. It allows large companies with high-volume communications needs to design their own communications networks by selecting from a range of services available through the network, and plugging in the devices they need to do their business.

Like Lego, ISDN can be configured in myriad ways. It permits permanent, high-volume links to be established between offices in widely separated locations so that big computers can talk to each other.

Charges for all ISDN use are based on the amount of information sent.

The blazingly fast G4 fax can transmit a full A4 page in a few seconds, and the image emerges perfect and with the tiniest detail still visible, as if fresh from a laser printer.

The same link allows an executive in Melbourne to call a colleague in Sydney as easily as dialing an extension in the same building.

One can sketch a diagram on his computer terminal, and it will appear at the other end as it is being drawn.

Photographs can be digitized on a scanner and sent to a computer or printer as they speak, and if they wish, the colleagues can even see each other’s faces on slow scan video.

ISDN’s availability will lead to a change in the design of items like telephones, personal computers, printers and faxes — already companies are making devices that integrate all four.

As Australian and overseas networks develop, and ISDN communication between continents increases, the global village will shrink even further.

Number may be up for the telephone Grahame O’Neill, Science and Technology Reporter
‘The AGE’ Melbourne Australia – Friday 11 August 1989

Telecom Australia – ISDN Training Manual

Open5Gs Logo

Open5GS – Splitting Network Elements

Note: NextEPC the Open Source project rebranded as Open5Gs in 2019 due to a naming issue. The remaining software called NextEPC is a branch of an old version of Open5Gs. This post was written before the rebranding.

I’ve been working for some time on Private LTE networks, and wrote my own HSS (See PyHSS – Python Home Subscriber Server).

The packet core I’m using is NextEPC, it’s well written, flexible and well supported.

I joined the Open5Gs group and I’ve contributed a few bits and pieces to the project.

One of which was how to split all the network elements in NextEPC:

NextEPC Splitting Network Elements

In a production network network elements would typically not all be on the same machine, as is the default example that ships with NextEPC.

NextEPC is designed to be standards compliant, so in theory you can connect any core network element (MME, PGW, SGW, PCRF, HSS) from NextEPC or any other vendor to form a functioning network, so long as they are 3GPP compliant.

To demonstrate this we will cover isolating each network element onto it’s on machine and connect each network element to the other. For some interfaces specifying multiple interfaces is supported to allow connection to multiple

In these examples we’ll be connecting NextEPC elements together, but it could just as easily be EPC elements from a different vendor in the place of any NextEPC network element.

ServiceIPIdentity
P-GW10.0.1.121pgw.localdomain
S-GW10.0.1.122 
PCRF10.0.1.123pcrf.localdomain
MME10.0.1.124mme.localdomain
HSS10.0.1.118hss.localdomain

External P-GW

In it’s simplest from the P-GW has 3 interfaces:

  • S5 – Connection to home network S-GW (GTP-C)
  • Gx – Connection to PCRF (Diameter)
  • Sgi – Connection to external network (Generally the Internet via standard TCP/IP)

S5 Interface Configuration

Edit /etc/nextepc/pgw.confand change the address to IP of the server running the P-GW for the listener on GTP-C and GTP-U interfaces.

pgw:
    freeDiameter: pgw.conf
    gtpc: 
      addr:
        - 10.0.1.121
     gtpu: 
      addr:
        - 10.0.1.121

Gx Interface Configuration

Edit /etc/nextepc/freeDiameter/pgwd.conf

Update ListenOn address to IP of the server running the P-GW:

ListenOn = "10.0.1.121";

Update ConnectPeer to connect to the PCRF on it’s IP.

ConnectPeer = "pcrf.localdomain" { ConnectTo = "10.0.1.123"; No_TLS; };

Restart Services

Restart NextEPC PGW Daemon:

$ sudo systemctl restart nextepc-pgwd

External S-GW

In it’s simplest form the S-GW has 2 interfaces:

  • S11 – Connection to MME (GTP-C)
  • S5 – Connection to the home network P-GW (GTP-C)

S5 Interface Configuration

Edit /etc/nextepc/sgw.confand change the address to IP of the server running the S-GW for the listener on GTP-C interface.

sgw:
    freeDiameter: pgw.conf
    gtpc: 
      addr:
        - 10.0.1.122

Restart NextEPC SGW Daemon:

$ sudo systemctl restart nextepc-sgwd

External PCRF

In it’s simplest from the PCRF has 1 network interface:

  • Gx – Connection to P-GW (Diameter)

Gx Interface Configuration

Edit /etc/nextepc/freeDiameter/hss.conf

Update ListenOn address to IP of the server running the HSS on it’s IP:

ListenOn = "10.0.1.123";

Update ConnectPeer to connect to the MME.

ConnectPeer = "pgw.localdomain" { ConnectTo = "10.0.1.121"; No_TLS; };

MongoDB Interface Configuration (NextEPC HSS only)

Edit /etc/nextepc/freeDiameter/hss.conf and change the db_uri: to point at the HSS: db_uri: mongodb://10.0.1.118/nextepc

Restart NextEPC PCRF Daemon:

$ sudo systemctl restart nextepc-pcrfd

External HSS

In it’s simplest form the HSS has 1 network interface:

  • S6a – Connection to MME (Diameter)

S6a Interface Configuration

Edit /etc/nextepc/freeDiameter/hss.conf

Update ListenOn address to IP of the server running the HSS on it’s IP:

ListenOn = "10.0.1.118";

Update ConnectPeer to connect to the MME.

ConnectPeer = "mme.localdomain" { ConnectTo = "10.0.1.124"; No_TLS; };

Restart NextEPC HSS Daemon:

$ sudo systemctl restart nextepc-hssd

MongoDB Interface Configuration (NextEPC specific)

If you are using NextEPC’s HSS you may need to enable MongoDB access from the PCRF. This is done by editing ‘‘/etc/mongodb.conf’’ and changing the bind IP to: bind_ip = 0.0.0.0

Restart MongoDB for changes to take effect.

$ /etc/init.d/mongodb restart

External MME

In it’s simplest form the MME has 3 interfaces:

  • S1AP – Connections from eNodeBs
  • S6a – Connection to HSS (Diameter)
  • S11 – Connection to S-GW (GTP-C)

S11 Interface Configuration

Edit /etc/nextepc/mme.conf, filling the IP address of the S-GW and P-GW servers.

sgw:
    gtpc:
      addr: 10.0.1.122

pgw:
    gtpc:
      addr:
        - 10.0.1.121

S6a Interface Configuration

Edit /etc/nextepc/freeDiameter/mme.conf

Update ListenOn address to IP of the server running the MME:

ListenOn = "10.0.1.124";

Update ConnectPeer to connect to the PCRF on it’s IP.

ConnectPeer = "hss.localdomain" { ConnectTo = "10.0.1.118"; No_TLS; };

Restart Services

Restart NextEPC MME Daemon:

$ sudo systemctl restart nextepc-mmed

Kamailio Bytes – DMQ

We’ve talked about using a few different modules, like a SIP Registrar and Htable, that rely on data stored in Kamailio’s memory, the same is true for all the Stateful proxy discussion last week.

But what if you want to share this data between multiple Kamailio instances? This allows distributing workload and every server having the same information and therefore any server is able to process any request.

Enter DMQ the Distributed Messaging Queue,

This allows memory data to be shared between multiple Kamailio instances (aka “Nodes”), so for example if you are storing data in Htable on one Kamailio box, all the other boxes/nodes in the DMQ pool will have the same HTable data.

Kamailio uses SIP to transfer DMQ messages between DMQ nodes, and DNS to discover DMQ nodes.

For this example we’ll share user location data (usrloc) between Kamailio instances, so we’ll create a very simple setup to store location data:

####### Routing Logic ########


/* Main SIP request routing logic
 * - processing of any incoming SIP request starts with this route
 * - note: this is the same as route { ... } */
request_route {

        #Enable record_routing so we see the BYE / Re-INVITE etc

        if(is_method("REGISTER")){

                save("location");
        }else{
                sl_reply("500", "Nope");
        }


}

Now if we register a SIP endpoint we should be able to view it using Kamcmd’s ul.dump call, as we talked about in the Kamailio SIP Registrar tutorial.

Next we’ll setup DMQ to allow this data to be shared to other nodes, so they also have the same userloc data available,

First we’ll begin by binding to an extra port for the DMQ messages to go to, to make it a bit clearer what is normal SIP and what’s DMQ,

So for this we’ll add a new line in the config to listen on port 5090:

/* uncomment and configure the following line if you want Kamailio to
 * bind on a specific interface/port/proto (default bind on all available) */
listen=udp:0.0.0.0:5060
listen=tcp:0.0.0.0:5060
listen=udp:0.0.0.0:5090

Next we’ll load the DMQ modules and set them up:

loadmodule "dmq.so"
loadmodule "dmq_usrloc.so"

# ---- dmq params ----
modparam("dmq", "server_address", "sip:0.0.0.0:5090")
modparam("dmq", "notification_address", "sip:dmq.nickvsnetworking.com:5090")
modparam("dmq", "multi_notify", 1)
modparam("dmq_usrloc", "enable", 1)

The server_address means we’re listening on any IP on port 5090. In production you may have an IP set here of a private NIC or something non public facing.

The notification address resolves to 2x A records, one is the IP of this Kamailio instance / node, the other is the IP of the other Kamailio instance / node, I’ve just done this in /etc/hosts

root@dmq1:/etc/kamailio# nslookup dmq.nickvsnetworking.com
 Server:         127.0.0.53
 Address:        127.0.0.53#53
 Non-authoritative answer:
 Name:   dmq.nickvsnetworking.com
 Address: 192.168.3.121
 Name:   dmq.nickvsnetworking.com
 Address: 192.168.3.116

Finally we’ll add some routing logic to handle the DMQ messages coming in on port 5090:

####### Routing Logic ########


/* Main SIP request routing logic
 * - processing of any incoming SIP request starts with this route
 * - note: this is the same as route { ... } */
request_route {


        if (is_method("KDMQ") && $Rp == 5090)
        {
                dmq_handle_message();
        }

        #Enable record_routing so we see the BYE / Re-INVITE etc

        if(is_method("REGISTER")){

                save("location");
        }else{
                sl_reply("500", "Nope");
        }


}

We’ll put the same config on the other Kamailio instance and restart Kamailio on both.

We can now check the DMQ node status to confirm they’re talking to each other.

root@dmq1:/etc/kamailio# kamcmd dmq.list_nodes
 {
         host: 192.168.3.116
         port: 5090
         resolved_ip: 192.168.3.116
         status: active
         last_notification: 0
         local: 0
 }
 {
         host: 192.168.3.121
         port: 5090
         resolved_ip: 192.168.3.121
         status: active
         last_notification: 0
         local: 0
 }
 {
         host: 0.0.0.0
         port: 5090
         resolved_ip: 0.0.0.0
         status: active
         last_notification: 0
         local: 1
 }

Bingo they are,

Now if I register to one of these two instances, I can run a kamcmd ul.dump on either and they’ll both have the same data. Magic!

As always I’ve posted a copy of my code on GitHub here.

Kamailio Bytes – Transaction Module

We talked a little about the Transaction module and using it for Transaction Stateful SIP Proxy, but it’s worth knowing a bit more about the Transaction Module and the powerful functions it offers.

So today I’ll cover some cool functionality TM offers!

Different Reply Routes

By calling the t_on_reply(); we can specify the reply route to be used for replies in this transaction.

route[RELAY]{

        #Use reply route "OurReplyRoute" for responses for this transaction
        t_on_reply("OurReplyRoute");

        #Relay (aka Forward) the request
        t_relay_to_udp("192.168.3.118", "5060");

}

onreply_route[OurReplyRoute] {
        #On replies from route[RELAY]

        #Check our AVP we set in the initial request
        xlog("for $rs response the value of AVP \"state_test_var\" is $avp(state_test_var) ");

        #Append a header so we can see this was proxied in the SIP capture
        append_hf("X-Proxied: For the reply\r\n");

}

Any responses from the route[RELAY] routing block will go to onreply_route[OurReplyRoute], the beauty of this is it allows you to have multiple reply routes each with their own logic. For example for a call leg to a carrier you may want to preserve CLI, but for a call leg to a customer you may wish to restrict it if that’s the option the user has selected, and you can make these changes / modifications in the reply messages.

Failure Routes

Failure routes allow the transaction module to know to try again if a call fails, for example if no response is received from the destination, send it to a different destination, like a backup.

route[RELAY]{

        #Use reply route "OurReplyRoute" for responses for this transaction
        t_on_reply("OurReplyRoute");
        t_on_failure("OurFailureRoute");
        #Relay (aka Forward) the request
        t_relay_to_udp("192.168.1.118", "5060");

}

failure_route[OurFailureRoute]{
        xlog("At failure route");
        t_reply("500", "Remote end never got back to us");
        exit;
}

We can build upon this, and try a different destination if the first one fails:

request_route {

        #Enable record_routing so we see the BYE / Re-INVITE etc
        record_route();

        #Handle Registrations in a dumb way so they don't messy our tests
        if(is_method("REGISTER")){
                sl_reply("200", "ok");
                exit;
        }


                 #Append a header so we can see this was proxied in the SIP capture
                append_hf("X-Proxied: You betcha\r\n");

        if(is_method("INVITE")){
                        #Createa  new AVP called "state_test_var" and set the value to "I remember"
                        $avp(state_test_var) = "I remember";
        }
                #Let syslog know we've set the value and check it
                xlog("for $rm the value of AVP \"state_test_var\" is $avp(state_test_var) ");

                #Send to route[RELAY] routing block
                rewritehostport("nonexistentdomain.com");
                route(RELAY);

}

route[RELAY]{

        #Use reply route "OurReplyRoute" for responses for this transaction
        t_on_reply("OurReplyRoute");
        t_on_failure("OurFailureRoute");
        #Relay (aka Forward) the request
        t_relay();
}

failure_route[OurFailureRoute]{
        xlog("At failure route");
        #t_reply("500", "Remote end never got back to us");

                rewritehostport("192.168.3.118");
                append_branch();
                t_relay();

}

onreply_route[OurReplyRoute] {
        #On replies from route[RELAY]

        #Check our AVP we set in the initial request
        xlog("for $rs response the value of AVP \"state_test_var\" is $avp(state_test_var) ");

        #Append a header so we can see this was proxied in the SIP capture
        append_hf("X-Proxied: For the reply\r\n");

}

One thing to keep in mind is that there’s lots of definitions of failure, for example if you are sending a call to a carrier and get a 404 response back, you probably want to relay that through to the end user, because that destination isn’t there.

But if you get back a 5xx series response you may consider that to be a failure and select the next carrier for example.

Different conditions / requirements have different definitions of “failures” and so there’s a lot to think about when implementing this, along with timeouts for no replies, TCP session management, etc.

Parallel Forking the Call to Multiple Destinations

Parallel Forking is a fancy way of saying ring multiple destinations at the same time.

/* Main SIP request routing logic
 * - processing of any incoming SIP request starts with this route
 * - note: this is the same as route { ... } */
request_route {

        #Enable record_routing so we see the BYE / Re-INVITE etc
        record_route();

        #Handle Registrations in a dumb way so they don't messy our tests
        if(is_method("REGISTER")){
                sl_reply("200", "ok");
                exit;
        }


                 #Append a header so we can see this was proxied in the SIP capture
                append_hf("X-Proxied: You betcha\r\n");

        if(is_method("INVITE")){
                        #Createa  new AVP called "state_test_var" and set the value to "I remember"
                        $avp(state_test_var) = "I remember";
        }
                #Let syslog know we've set the value and check it
                xlog("for $rm the value of AVP \"state_test_var\" is $avp(state_test_var) ");

                #Send to route[RELAY] routing block
                route(RELAY);

}

route[RELAY]{

        #Use reply route "OurReplyRoute" for responses for this transaction
        t_on_reply("OurReplyRoute");

        #Append branches for each destination we want to forward to
        append_branch("sip:[email protected]");
        append_branch("sip:[email protected]");
        append_branch("sip:[email protected]");

        t_on_failure("OurFailureRoute");
        #Relay (aka Forward) the request
        t_relay();
}

failure_route[OurFailureRoute]{
        xlog("At failure route");
        t_reply("500", "All those destinations failed us");

}

onreply_route[OurReplyRoute] {
        #On replies from route[RELAY]

        #Check our AVP we set in the initial request
        xlog("for $rs response the value of AVP \"state_test_var\" is $avp(state_test_var) ");

        #Append a header so we can see this was proxied in the SIP capture
        append_hf("X-Proxied: For the reply\r\n");

}

Bit of a mess but here we see the initial INVITE being branched to the 3 destinations at the same time (Parallel forking)

Serial Forking / Sequential Forking the calls to Multiple Destinations one after the Other

This could be used to try a series of weighted destinations and only try the next if the preceding one fails:

/* Main SIP request routing logic
 * - processing of any incoming SIP request starts with this route
 * - note: this is the same as route { ... } */
request_route {

        #Enable record_routing so we see the BYE / Re-INVITE etc
        record_route();


        #Send to route[RELAY] routing block
        route(RELAY);

}

route[RELAY]{

        #Use reply route "OurReplyRoute" for responses for this transaction
        t_on_reply("OurReplyRoute");

        append_branch("sip:[email protected]", "0.3");
        append_branch("sip:[email protected]", "0.2");
        append_branch("sip:[email protected]", "0.1");

        t_load_contacts();

        t_next_contacts();

        t_on_failure("OurFailureRoute");
        #Relay (aka Forward) the request
        t_relay();
        break;
}

failure_route[OurFailureRoute]{

        xlog("At failure route - Trying next destination");
        t_on_failure("OurFailureRoute");
        t_relay();


}

onreply_route[OurReplyRoute] {
        #On replies from route[RELAY]
        #Append a header so we can see this was proxied in the SIP capture
        append_hf("X-Proxied: For the reply\r\n");

}

Again this will try each destination, but one after the other based on the weight we added to each destination in the append_branch()

Here we see each destination being tried sequentially

Transaction Stateful Proxy with Kamailio

We covered the 3 different types of SIP Proxy, Stateless, Transaction Stateful and Dialog Stateful.

It’s probably worth going back to have a read over the description of the types of proxy and have a read over the whole Stateless proxy we implemented in Kamailio, before we get started on Stateful proxies, because we’ll be carrying on from what we started there.

The Setup

The 3 different proxies all do the same thing, they all relay SIP messages, so we need a way to determine what state has been saved.

To do this we’ll create a variable (actually an AVP) in the initial request (in our example it’ll be an INVITE), and we’ll reference it when handling a response to make sure we’ve got transactional state.

We’ll also try and reference it in the BYE message, which will fail, as we’re only creating a Transaction Stateful proxy, and the BYE isn’t part of the transaction, but in order to see the BYE we’ll need to enable Record Routing.

Stateless Proof

Before we add any state, let’s create a working stateless proxy, and add see how it doesn’t remember:

####### Routing Logic ########


/* Main SIP request routing logic
 * - processing of any incoming SIP request starts with this route
 * - note: this is the same as route { ... } */
request_route {

        #Enable record_routing so we see the BYE / Re-INVITE etc
        record_route();

        #Handle Registrations in a dumb way so they don't messy our tests
        if(is_method("REGISTER")){
                sl_reply("200", "ok");
                exit;
        }


                 #Append a header so we can see this was proxied in the SIP capture
                append_hf("X-Proxied: You betcha\r\n");

        if(is_method("INVITE")){
                        #Createa  new AVP called "state_test_var" and set the value to "I remember"
                        $avp(state_test_var) = "I remember";
        }
                #Let syslog know we've set the value and check it
                xlog("for $rm the value of AVP \"state_test_var\" is $avp(state_test_var) ");

                #Forard to new IP
                forward("192.168.3.118");


}

onreply_route{
        #Check our AVP we set in the initial request
        xlog("for $rs response the value of AVP \"state_test_var\" is $avp(state_test_var) ");

        #Append a header so we can see this was proxied in the SIP capture
        append_hf("X-Proxied: For the reply\r\n");
}

Now when we run this and call from any phone other than 192.168.3.118, the SIP INVITE will hit the Proxy, and be forwarded to 192.168.3.118.

Syslog will show the INVITE and us setting the var, but for the replies, the value of AVP $avp(state_test_var) won’t be set, as it’s stateless.

Let’s take a look:

kamailio[2577]: {1 1 INVITE [email protected]} ERROR: : for INVITE the value of AVP "state_test_var" is I remember
kamailio[2575]: {2 1 INVITE [email protected]} ERROR: <script>: for 100 response the value of AVP "state_test_var" is <null>
kamailio[2576]: {2 1 INVITE [email protected]} ERROR: <script>: for 180 response the value of AVP "state_test_var" is <null>
kamailio[2579]: {2 1 INVITE [email protected]} ERROR: <script>: for 200 response the value of AVP "state_test_var" is <null>
kamailio[2580]: {1 1 ACK [email protected]} ERROR: <script>: for ACK the value of AVP "state_test_var" is <null>
kamailio[2581]: {1 2 BYE [email protected]} ERROR: <script>: for BYE the value of AVP "state_test_var" is <null>

We can see after the initial INVITE none of the subsequent replies knew the value of our $avp(state_test_var), so we know the proxy is at this stage – Stateless.

I’ve put a copy of this code on GitHub for you to replicate yourself.

Adding State

Doing the heavy lifting of our state management is the Transaction Module (aka TM). The Transaction Module deserves a post of it’s own (and it’ll get one).

We’ll load the TM module (loadmodule “tm.so”) and use the t_relay() function instead of the forward() function.

But we’ll need to do a bit of setup around this, we’ll need to create a new route block to call t_relay() from (It’s finicky as to where it can be called from), and we’ll need to create a new reply_route{} to manage the response for this particular dialog.

Let’s take a look at the code:

####### Routing Logic ########


/* Main SIP request routing logic
 * - processing of any incoming SIP request starts with this route
 * - note: this is the same as route { ... } */
request_route {

        #Enable record_routing so we see the BYE / Re-INVITE etc
        record_route();

        #Handle Registrations in a dumb way so they don't messy our tests
        if(is_method("REGISTER")){
                sl_reply("200", "ok");
                exit;
        }


                 #Append a header so we can see this was proxied in the SIP capture
                append_hf("X-Proxied: You betcha\r\n");

        if(is_method("INVITE")){
                        #Createa  new AVP called "state_test_var" and set the value to "I remember"
                        $avp(state_test_var) = "I remember";
        }
                #Let syslog know we've set the value and check it
                xlog("for $rm the value of AVP \"state_test_var\" is $avp(state_test_var) ");

                #Send to route[RELAY] routing block
                route(RELAY);

}

route[RELAY]{

        #Use reply route "OurReplyRoute" for responses for this transaction
        t_on_reply("OurReplyRoute");

        #Relay (aka Forward) the request
        t_relay_to_udp("192.168.3.118", "5060");

}

onreply_route[OurReplyRoute] {
        #On replies from route[RELAY]

        #Check our AVP we set in the initial request
        xlog("for $rs response the value of AVP \"state_test_var\" is $avp(state_test_var) ");

        #Append a header so we can see this was proxied in the SIP capture
        append_hf("X-Proxied: For the reply\r\n");

}

So unlike before where we just called forward(); to forward the traffic we’re now calling in a routing block called RELAY.

Inside route[RELAY] we set the routing block that will be used to manage replies for this particular transaction, and then call t_relay_to_udp() to relay the request.

We renamed our onreply_route to onreply_route[OurReplyRoute], as specified in the route[RELAY].

So now let’s make a call (INVITE) and see how it looks in the log:

kamailio[5008]: {1 1 INVITE [email protected]} ERROR: : for INVITE the value of AVP "state_test_var" is I remember
kamailio[5005]: {2 1 INVITE [email protected]} ERROR: <script>: for 100 response the value of AVP "state_test_var" is I remember
kamailio[5009]: {2 1 INVITE [email protected]} ERROR: <script>: for 180 response the value of AVP "state_test_var" is I remember
kamailio[5011]: {2 1 INVITE [email protected]} ERROR: <script>: for 200 response the value of AVP "state_test_var" is I remember
kamailio[5010]: {1 1 ACK [email protected]} ERROR: <script>: for ACK the value of AVP "state_test_var" is <null>
kamailio[5004]: {1 2 BYE [email protected]} ERROR: <script>: for BYE the value of AVP "state_test_var" is <null>
kamailio[5007]: {2 2 BYE [email protected]} ERROR: <script>: for 200 response the value of AVP "state_test_var" is <null>

Here we can see for the INVITE, the 100 TRYING, 180 RINGING and 200 OK responses, state was maintained as the variable we set in the INVITE we were able to reference again.

(The subsequent BYE didn’t get state maintained because it’s not part of the transaction.)

And that’s it.

Here’s a copy of my running code on GitHub.

Hopefully now you’ve got an idea of the basics of how to implement a transaction stateful application in Kamailio.

SIP SDP – ptime

ptime is the packetization timer in VoIP, it’s set in the SDP message and defines the length of each RTP packet that’s sent;

This gives the length of time in milliseconds represented by the media in a packet. This is probably only meaningful for audio data, but may be used with other media types if it makes sense. It should not be necessary to know ptime to decode RTP or vat audio, and it is intended as a recommendation for the encoding/packetisation of audio. It is a media-level attribute, and it is not dependent on charset.

RFC 4556 – SDP: Session Description Protocol, Section 6
SDP body showing ptime value of 20ms

What it’s all about

A lower ptime value leads to more packet per second, while longer ptime leads to fewer packets per second.

In a Toll Quality (TDM) network 8000 samples per second are taken, this is reflected in PCM (Pulse Code Modulation) encoding of the data, see in PCMA / G.711 a-law for example.

But if each of these 8,000 samples per second were sent on an individual packet, we’d be seeing a huge number of tiny RTP packets where the header is a lot larger than the payload.

Instead endpoints generally wait until they’ve got a certain number of theses samples and then send them at once, every X milliseconds as defined by the ptime value.

  • A ptime of 1000ms would mean 1 packet per second.
  • A ptime of 20ms would mean 50 packets per second.
  • A ptime of 50ms would mean 20 packets per second.

ptime headaches

Some VoIP endpoints have issues with varied ptime (*cough Cisco SPA series cough*), and if you’re interconnecting with other carrier networks you have no real control as to what ptime endpoints use (except if you have a B2Bua that can resample / restuff the packets, or you use maxptime which really just limits more than fixes) so it’s worth understanding well.

International carrier trunks often have higher ptime values as they're often dealing with lower quality links, so they want to cut down the packets per second and often have jitter buffers in place to compensate for poor quality links.

RFC4566 (the second version of SDP) introduced the maxptime value.

This optional header in the SDP body allows an endpoint to specify the maximum ptime value it supports.

Older endpoints often don’t have much memory or processing power, so have very small buffers to store the received audio in before playing it to the user, and store the audio to be transmitted before sending it down the wire.

Mismatched ptime or a ptime that’s out of bounds for one endpoint can lead to some strange issues. Often an endpoint will ring, answer the call and even get a 200 OK, but immediately followed by a BYE from the incompatible end instead of an ACK.

In the initial INVITE ptime is not mandatory, meaning you may not know the caller has limits to the ptime values they can support, and the endpoint hangs up the calls straight after the 200 OK.

Identifying these issues may take some time, but here’s some good places to look:

  • SDP ptime value on INVITE and 200 OK
  • Time between RTP packets
  • Timestamp difference between RTP packets

Although it seems pretty self evident, if your endpoint only supports up to 20ms ptime, set the maxptime header to 20ms. You’d be surprised how often this isn’t the case.

You can read more about SDP on my Overview of SDP post and the RFC – RFC4566. You can lean about manipulating SDP headers in Kamailio in my post on SDPops.

Kamailio vs Asterisk

One of the most searched keywords that leads to this site is Kamailio vs Asterisk, so I thought I’d expand upon this a bit more as I’m a big fan of both, and it’s somewhat confusing.

(Almost everything in this post I talk about on Asterisk is roughly true for FreeSWITCH as well, although FS is generally more stable and scalable than Asterisk. )

Asterisk

Asterisk is a collection of PBX / softswitch components that you can configure and put together to create a large number of different products with the use of config files and modules.

Asterisk can read and write the RTP media stream, allowing it to offer services like Voicemail, B2B-UA, Conferencing, Playing back audio, call recording, etc.

It’s easy to learn and clear to understand how it handles “calls”.

Kamailio

Kamailio is a SIP proxy, from which you can modify SIP headers and then forward them on or process them and generate a response.

Kamailio is unable to do manipulate the RTP media stream. It can’t listen to, modify or add to the call audio, it only cares about SIP and not the media stream. This means it can’t playback an audio file, record a call or serve voicemail.

Kamailio has a bit of a steep learning curve, which I’ve tried to cover in my Kamailio 101 series, but even so, Kamailio doesn’t understand the concept of a “call”, it deals in Sessions, as in SIP, and everything you want to do, you have to write into Kamailio’s logic. Awesome power but a lot to take in.

Note – RTPengine is growing in capabilities and integrates beautifully into Kamailio, so for some applications you may be able to use RTPengine for media handling.

ScaleSpeedStabilityMedia FunctionsEase
AsteriskXX
KamailioXXX

Working Together

Asterisk has always had issues at scale. This is for a variety of reasons, but the most simplistic explanation is that Asterisk is fairly hefty software, and that each subscriber you add to the system consumes resources at a rate where once your system reaches a few hundred users you start to see issues with stability.

Kamailio works amazingly at scale, it’s architecture was designed with running at scale in mind, and it’s super lightweight footprint means the load on the box between handling 1,000 sessions and handling 100,000 sessions isn’t that much.

Because Asterisk has the feature set, and Kamailio has the scalability, so the the two can be used together really effectively. Let’s look at some examples of Asterisk and Kamailio working together:

Asterisk Clustering

You have a cluster of Asterisk based Voicemail servers, serving your softswitch environment. You can use a Kamailio instance to sit in front of them and route INVITEs evenly throughout the cluster of Asterisk instances.

You’d be using Asterisk’s VM functions (because Asterisk can do media functions) and Kamailio’s SIP routing functions.

Here’s an example of Kamailio Dispatcher acting in this function.

Application Server for SIP Softswitch

You have a Kamailio based Softswitch that routes SIP traffic from customers to carriers, customers want a hosted Conference Bridge. You offer this by routing any SIP INVITES to the address of the conference bridge to an Asterisk server that serves as the conference bridge.

You’d be using Kamialio to route the SIP traffic and using Asterisk’s ability to be aware of the media stream and join several sources to offer the conference bridge.

Which should I use?

It all depends on what you need to do.

If you need to do anything with the audio stream you probably need to use something like Asterisk, FreeSwitch, YaTE, etc, as Kamailio can’t do anything with the audio stream.*

If it’s just signalling, both would generally be able to work, Asterisk would be easier to setup but Kamailio would be more scaleable / stable.

Asterisk is amazingly quick and versatile when it comes to solving problems, I can whip something together with Asterisk that’ll fix an immediate need in a faction of the time I can do the same thing in Kamailio.

On the other hand I can fix a problem with Kamailio that’ll scale to hundreds of thousands of users without an issue, and be lightning fast and rock solid.

Summary

Kamailio only deals with SIP signalling. It’s very fast, very solid, but if you need to do anything with the media stream like mixing, muxing or transcoding (RTP / audio) itself, Kamailio can’t help you.*

Asterisk is able to deal with the media stream, and offer a variety of services through it’s rich module ecosystem, but the trade-off is less stability and more resource intensive.

If you do require Asterisk functionality it’s worth looking into FreeSWITCH, although slightly harder to learn it’s generally regarded as superior in a lot of ways to Asterisk.

I don’t write much about Asterisk these days – the rest of the internet has that pretty well covered, but I regularly post about Kamailio and other facets of SIP.

Kamailio Bytes – SDP Manipulation with SDPops

I’m not a fan of Transcoding. It costs resources, often leads to reduced quality and adds latency.

Through some fancy SDP manipulating footwork we can often rejig the SDP order or limit the codecs we don’t support to cut down, or even remove entirely, the need for transcoding in the network.

If you’re not yet familiar with SDP have a read over my post on SDP Overview.

Modparam

There are no module parameters for SDP ops, we’ve just got to load the module with loadmodule “sdpops.so”

Use in Routing Logic

We’ll pickup where we left off on the Basic Stateless SIP Proxy use case (You can grab the basic code from that post), but this time we’ll remove PCMU (Aka G.711 μ-law) from the SDP body:

loadmodule "sdpops.so"


####### Routing Logic ########


/* Main SIP request routing logic
 * - processing of any incoming SIP request starts with this route
 * - note: this is the same as route { ... } */
request_route {

if(is_method("REGISTER")){
        sl_reply("200", "Ok");
}

        xlog("Received $rm to $ru - Forwarding");

        append_hf("X-Proxied: You betcha\r\n");

        #Remove PCMU (G.711 u-law) by it's SDP Payload ID
        sdp_remove_codecs_by_id("0");

        #Remove PCMU by name
        sdp_remove_codecs_by_name("PCMU");


        #Forard to new IP
        forward("192.168.3.110");

}

onreply_route{
        xlog("Got a reply $rs");
        append_hf("X-Proxied: For the reply\r\n");
}

We can remove the codec either by it’s name (PCMU) or by it’s payload ID.

Before traversing the Proxy
After traversing the proxy

For removing it by name we just specify the name:

#Remove PCMU by name
sdp_remove_codecs_by_name("PCMU");

And by payload ID:

#Remove PCMU (G.711 u-law) by it's SDP Payload ID
sdp_remove_codecs_by_id("0");

We may want to remove all but one codec, again super simple:

#Only keep PCMA codec
sdp_keep_codecs_by_name("PCMA");

If you can’t help but transcode RTPengine now has this functionality, have a read of Transcoding with RTPengine and Kamailio and it may be worth looking over Virtualized Transcoding Dimensioning for an idea of how powerful your box is going to have to be.

SIP Extensions – Path

In vanilla RFC3261 SIP, a UA can only send a REGISTER request to a SIP Registrar.

It can’t go via any intermediary proxies.

That’s obviously a bit of a problem, as we build out our network we might have a series of load balancers that send traffic to a pool of Registrars, but according to RFC3261 this can’t be done, the SIP REGISTER request would need to go direct to one of these Registrars.

To get around this the SIP Path extensions, officially called “Session Initiation Protocol (SIP) Extension Header Field for Registering Non-Adjacent Contacts” (catchy title) was defined under RFC 3327.

An additional header is introduced called “Path:” for each proxy between the UA and the Registrar,

As the SIP REGISTER request passes through each proxy, each proxy appends the Path header with the value of it’s own SIP URI.

Let’s take a look at an example call flow from [email protected] who sends his REGISTER to atlanta.com, which is proxied by atlanta.com to registrar1.atlanta.com:

Bob to atlanta.com:

[email protected] > atlanta.com
      REGISTER sip:atlanta.com SIP/2.0
      Via: SIP/2.0/UDP 192.0.2.4:5060;branch=z9hG4bKnashds7
      To: Bob <sip:[email protected]>
      From: Bob <sip:[email protected]>;tag=456248
      Call-ID: 843817637684230@998sdasdh09
      CSeq: 1826 REGISTER
      Contact: <Bob <sip:[email protected]>>
      Supported: path

The REGISTER request is received by atlanta.com, which forwards it to registrar1.atlanta.com after adding it’s own URI as a Path header.

atlanta.com > registrar1.atlanta.com
      REGISTER sip:atlanta.com SIP/2.0
      Via: SIP/2.0/UDP atlanta.com;branch=z9hG4bK34ghi7ab04
      Via: SIP/2.0/UDP 192.0.2.4:5060;branch=z9hG4bKnashds7
      To: Bob <sip:[email protected]>
      From: Bob <sip:[email protected]>;tag=456248
      Call-ID: 843817637684230@998sdasdh09
      CSeq: 1826 REGISTER
      Contact: <Bob <sip:[email protected]>>
      Supported: path
      Path: <sip:atlanta.com;lr>

The response is sent back in the same way, relying on the via headers and Path headers.

Virtualized Transcoding Dimensioning

A seemingly simple question is how many concurrent calls can a system handle.

Sadly the answer to that question is seldom simple and easy to say, even more so when we talk about transcoding.

Transcoding is the process of taking a media stream encoded in one codec (format) and transferring it to a different codec (hence trans-coding).

This can be a very resource intensive process, so there’s a large number of hardware based solutions (PCI cards / network devices) that use FGPAs and clever processor arrangements to handle the transcoding. These products are made by a multitude of different vendors but are generally called hardware transcoders.

Today we’ll talk a bit about software based transcoding, and how many concurrent calls you can transcode on common VM configurations.

These stats will translate fairly well to their dedicated hardware counterparts, but a VM provides us with a consistent hardware environment so makes it a bit easier.

For these tests I created the baseline VM to run in VMWare Workstation with the below settings:

We’ll be transcoding using RTPengine, which recently added transcoding capabilities, so I set that up as per my post on setting up RTPengine for Transcoding.

Next I setup some SIPp scenarios to simulate call loads, from G.711 a-law to G.711 u-law (the simplest of transcoding (well re-compounding)) and used glances to get the max CPU usage and logged the results.

PCMA to PCMU (Re-companding)

PCMA to PCMU

RTPengine fared significantly better than I expected, I stopped at 150 concurrent transcoding sessions as that’s when call quality was really starting to degrade, but I was still achieving MOS of 4.3+ up to 130 concurrent sessions.

For what I needed to do, running this in a virtualised environment allowed 150 transcoding sessions before the MOS started to drop and call quality was adversely affected. Either way I was pretty amazed at how efficiently RTPengine managed to handle this.

Transcoding from one codec to a different codec was a different matter, and I’ll post the results from that another day.

If you want to learn more about RTPengine have a read of my other posts on RTPengine, that cover Installing and configuring RTPengine, using RTPengine with Kamailio, transcoding with RTPengine and scaling with RTPengine over geographic areas.