Slicing has long been held up as one of the monetizations opportunities for residential customers, but few seem to be familiar with it beyond a concept, so I thought I’d take a look at how it actually works in Android, and how an end user would interact with it.
For starters, there’s a little used hook in Android TelephonyManager called purchasePremiumCapability, this method can be called by a carrier’s self care app.
Operators would need the Telephony Permission for their app, and a function from the app in order to activate this, but it doesn’t require on Android Carrier Privileges and a matching signature on the SIM card, although there’s a lot of good reasons to include this in your Android Manifest for a Carrier Self-Care app.
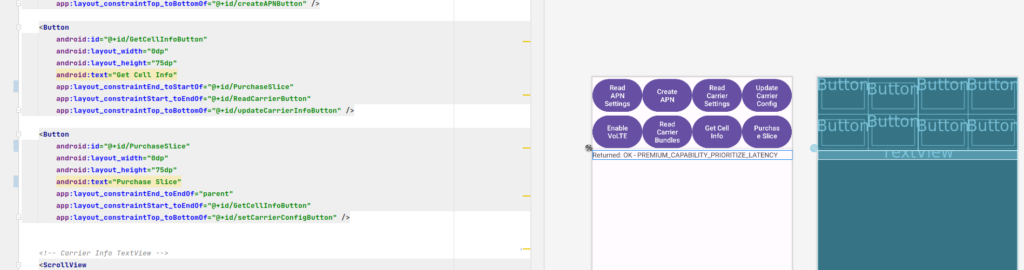
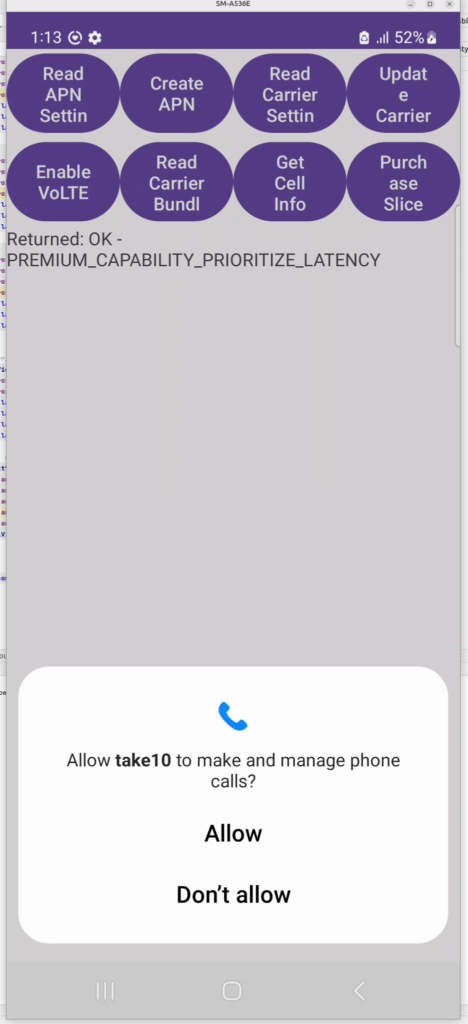
We’ve made a little test app we use for things like enabling VoLTE, setting the APNs, setting carrier config, etc, etc. I added the Purchase Slice capability to it and give it a shot.
And the hook works, I was able to “purchase” a Slice.
I did some sleuthing to find if any self-care apps from carriers have implemented this functionality for standards-based slicing, and I couldn’t find any, I’m curious to see if it takes off – as I’ve written about previously slicing capabilities are not new in cellular, but the attempt to monetise it is.
Android, being open source, allows us to see how this logic works, and it’s important for operators to understand this logic, as it’s what dictates the behavior in many scenarios.
It’s important to note that I’m not covering Apple here, this information is not publicly available to share for iOS devices, so I won’t be sharing anything on this – Apple has their own ecosystem to handle emergency calling, if you’re from an operator and reading this, I’d suggest getting in touch with your Apple account manager to discuss it, they’re always great to work with.
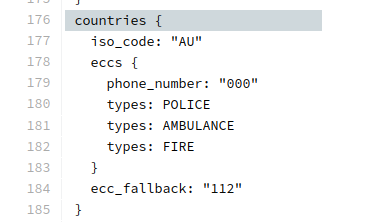
The Android Open Source Project has an “emergency number database”. This database has each of the emergency phone numbers and the corresponding service, for each country.
This file can be read at packages/services/Telephony/ecc/input/eccdata.txt on a phone with engineering mode.
Let’s take a look what’s in mainline Android for Australia:
I build phone networks, and unfortunately, I’m not able to be everywhere at once.
This means sometimes I have to test things in networks I may not be within the coverage of.
To get around this, I’ve setup something pretty simple, but also pretty powerful – Remote test phones.
Using a Raspberry Pi, Intel NUC, or any old computer, I’m able to remotely control Android handsets out in the field, in the coverage footprint of whatever network I need.
This means I can make test calls, run speed testing, signal strength measurements, on real phones out in the network, without leaving my office.
Base OS
Because of some particularities with Wayland and X11, for this I’d steer clear of Ubuntu distributions, and suggest using Debian if you’re using x86 hardware, and Raspbian if you’re using a Pi.
Setup Android Debug Bridge (adb)
The base of this whole system is ADB, the Android Debug Bridge, which exposes the ability to remotely control an Android phone over USB.
You can also do this over WiFi, but I find for device testing, wired allows me to airplane mode a device or disable data, which I can’t do if the device is connected to ADB via WiFi.
There’s lot of info online about setting Android Debug Bridge up on your device, unlocking the Developer Mode settings, etc, if you’ve not done this before I’ll just refer you to the official docs.
Before we plug in the phones we’ll need to setup the software on our remote testing machine, which is simple enough:
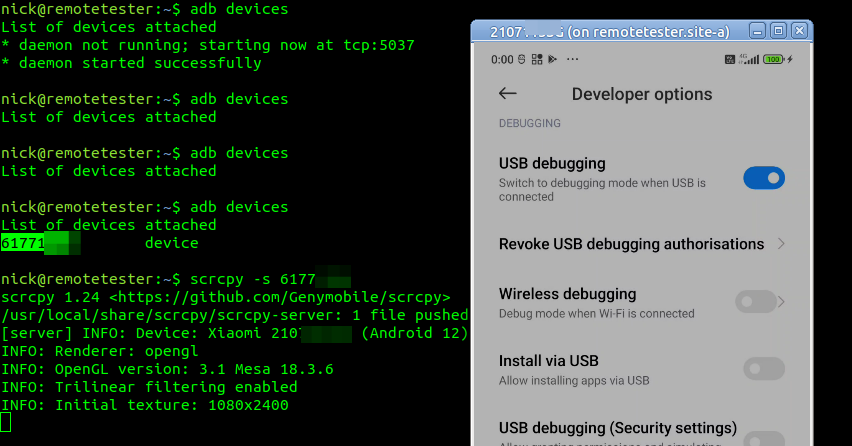
Now we can plug in each of the remote phones we want to use for testing and run the command “adb devices” which should list the phones with connected to the machine with ADB enabled:
[email protected]:~$ adb devices
List of devices attached
ABCDEFGHIJK	unauthenticated
LMNOPQRSTUV	unauthenticated
You’ll get a popup on each device asking if you want to allow USB debugging – If this is going to be a set-and-forget deployment, make sure you tick “Always allow from this Computer” so you don’t have to drive out and repeat this step, and away you go.
Lastly we can run adb devices again to confirm everything is in the connected state
Scrcpy
scrcpy an open-source remote screen mirror / controller that allows us to control Android devices from a computer.
In our case we’re going to install with Snap (if you hate snaps as many folks do, you can also compile from source):
After SSHing into the box, we can just run scrcpy and boom, there’s the window we can interact with.
If you’ve got multiple devices connected to the same device, you’ll need to specify the ADB device ID, and of course, you can have multiple sessions open at the same time.
scrcpy -s 61771fe5
That’s it, as simple as that.
Tweaking
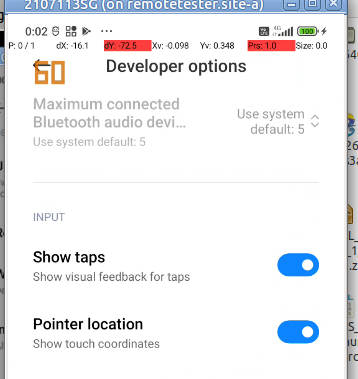
A few settings you may need to set:
I like to enable the “Show taps” option so I can see where my mouse is on the touchscreen and see what I’ve done, it makes it a lot easier when recording from the screen as well for the person watching to follow along.
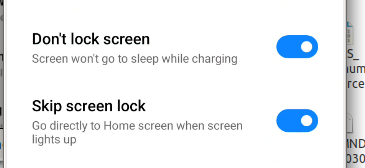
You’ll probably also want to disable the lock screen and keep the screen awake
Some OEMs have an additonal tick box if you want to be able to interact with the device (rather than just view the screen), which often requires signing into an account, if you see this toggle, you’ll need to turn it on:
Ansible Playbook
I’ve had to build a few of these, so I’ve put an Ansible Playbook on Github so you can create your own.
So a problem had arisen, carriers wanted to change certain carrier related settings on devices (Specifically the Carrier Config Manager) in the Android ecosystem. The Android maintainers didn’t want to open the permissions to change these settings to everyone, only the carrier providing service to that device.
And if you purchased a phone from Carrier A, and moved to Carrier B, how do you manage the permissions for Carrier B’s app and then restrict Carrier A’s app?
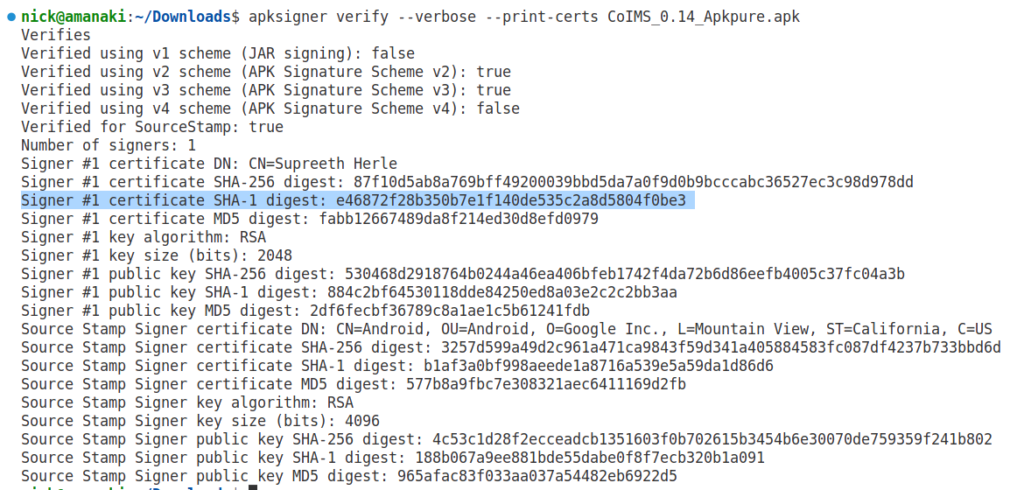
The carrier loads a certificate onto the SIM Cards, and signing Android Apps with this certificate, allowing the Android OS to verify the certificate on the card and the App are known to each other, and thus the carrier issuing the SIM card also issued the app, and presto, the permissions are granted to the app.
Carriers have full control of the UICC, so this mechanism provides a secure and flexible way to manage apps from the mobile network operator (MNO) hosted on generic app distribution channels (such as Google Play) while retaining special privileges on devices and without the need to sign apps with the per-device platform certificate or preinstall as a system app.
As anyone who’s setup a private LTE network can generally attest, APNs can be a real headache.
SIM/USIM cards, don’t store any APN details. In this past you may remember having to plug all these settings into your new phone when you upgraded so you could get online again.
Today when you insert a USIM belonging to a commercial operator, you generally don’t need to put APN settings in, this is because Android OS has its own index of APNs. When the USIM is inserted into the baseband module, the handset’s OS looks at the MCC & MNC in the IMSI and gets the APN settings automatically from Android’s database of APN details.
There is an option for the network to send the connectivity details to the UE in a special type of SMS, but we won’t go into that.
All this info is stored on the Android OS in apns-full-conf.xml which for non-rooted (stock) devices is not editable.
This file can override the user’s APN configuration, which can lead to some really confusing times as your EPC rejects the connection due to an unrecognized APN which is not what you have configured on the UE’s operating system, but it instead uses APN details from it’s database.
The only way around this is to change the apns-full-conf.xml file, either by modifying it per handset or submitting a push request to Android Open Source with your updated settings.
(I’ve only tried the former with rooted devices)
The XML file itself is fairly self explanatory, taking the MCC and MNC and the APN details for your network:
Once you’ve added yours to the file, inserting the USIM, rebooting the handset or restarting the carrier app is all that’s required for it to be re-read and auto provision APN settings from the XML file.