Monthly Archives: August 2018

Why z9hG4bK?

Every SIP branch value starts with z9hG4bK, why?

Branch IDs were introduced in RFC 3261, to help keep differentiate all the different transactions a device or proxy might be involved in.

The answer isn’t that exciting. IETF picked the 7 character long prefix as a magic cookie so older SIP servers (RFC 2543 compliant only) wouldn’t pick up the value due to it’s length.


The branch ID inserted by an element compliant with this specification MUST always begin with the characters “z9hG4bK”. These 7 characters are used as a magic cookie (7 is deemed sufficient to ensure that an older RFC 2543 implementation would not pick such a value), so that servers receiving the request can determine that the branch ID was constructed in the fashion described by this specification (that is, globally unique).

SIP: Session Initiation Protocol – RFC 3261

As to why z9hG4bK, instead of any other random 7 letter string, I haven’t been able to find an answer, but it’s as good as any random 7 letter string I guess.
SIP Via Header

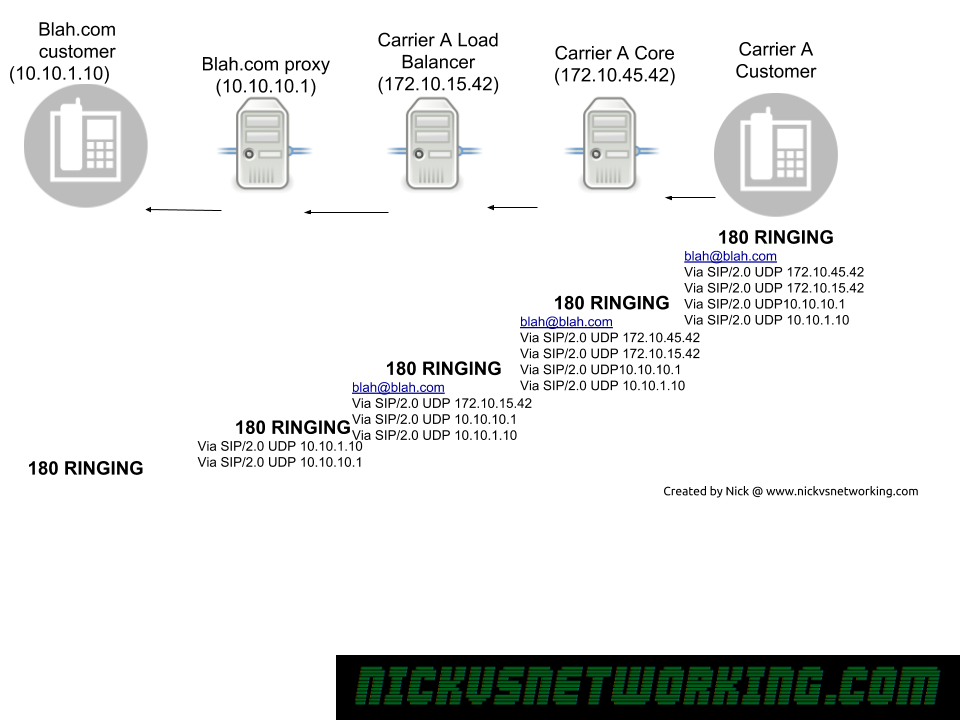
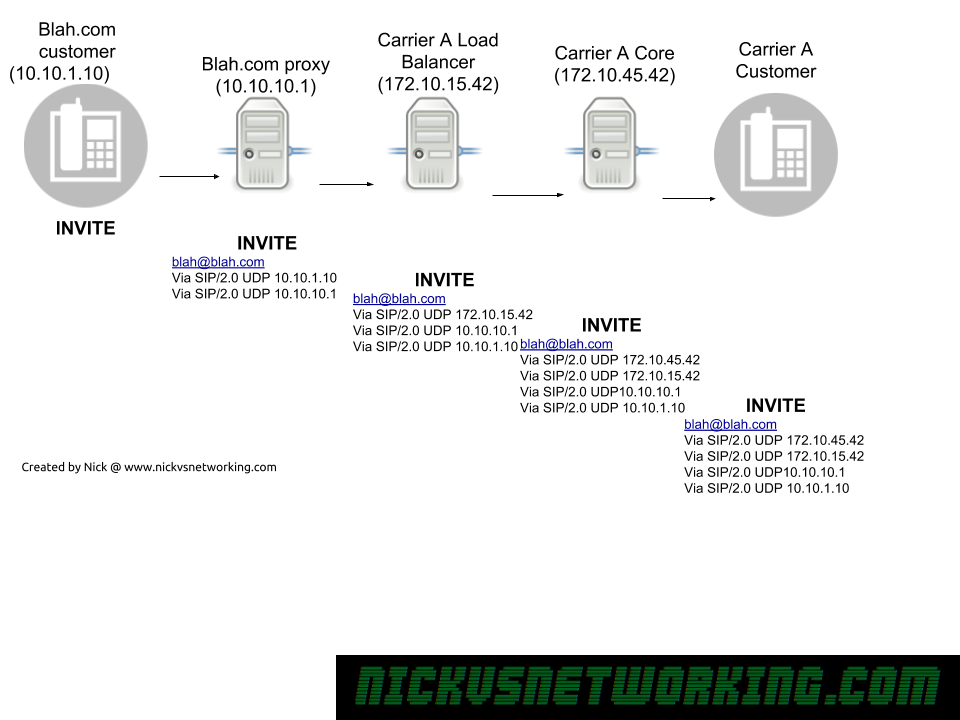
The SIP Via header is added by a proxy when it forwards a SIP message onto another destination,

When a response is sent the reverse is done, each SIP proxy removes their details from the Via header and forwards to the next Via header along.

SIP Via headers in action

As we can see in the example above, each proxy adds it’s own address as a Via header, before it uses it’s internal logic to work out where to forward it to, and then forward on the INVITE.

Now because all our routing information is stored in Via headers when we need to route a Response back, each proxy doesn’t need to consult it’s internal logic to work out where to route to, but can instead just strip it’s own address out of the Via header, and then forward it to the next Via header IP Address down in the list.

SIP Via headers in action

Via headers are also used to detect looping, a proxy can check when it receives a SIP message if it’s own IP address is already in a Via header, if it is, there’s a loop there.

Kamailio Bytes – MySQL Database Backend for Module Config

Many Kamailio modules require, or have additional functionality, when you’re using a database backend.

There’s a few options, but for this tutorial we’ll use a MySQL database backend.

To begin with we’ll install MySQL & Kamailio,

apt-get install kamailio* mysql-server

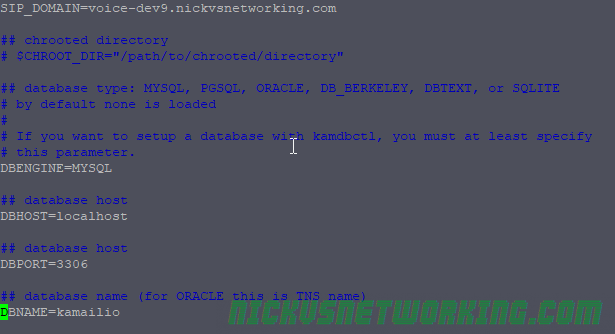
Next we’ll want to configure the file called kamctlrc in which we’ll add our database information so command line tools like kamcmd and kamctl can read and write from the database Kamailio is using.

vi /etc/kamailio/kamctlrc

We’ll need to set a few values, the SIP_DOMAIN, DBENGINE, DBHOST, DBNAME and DBPORT.

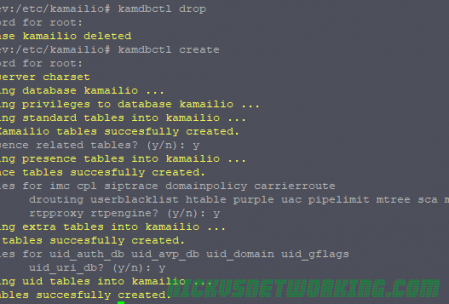
Next we’ll use the kamdbctl tool to create the database and tables required for Kamailio’s database driven modules.

kamdbctl create

Assuming you haven’t set a root password for MySQL you can just hit enter to leave it blank.

Next we’ll define a variable (AVP) in our Kamailio config file containing our database information. This means we only have to define it once and for each module we load we can just call this variable instead of defining our MySQL database information over and over again in the config.

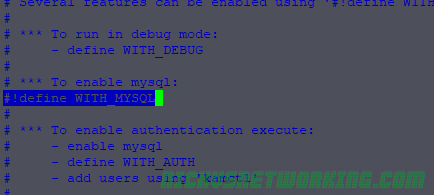
In the default config we’ll define WITH_MYSQL to use MySQL database config:

#!define WITH_MYSQL

That’ll automatically put the DBURL line into play:

And we’re done, now we can call different modules that have database functionality and start using it, some examples:

modparam("usrloc", "db_url", DBURL)
...
modparam("auth_db", "db_url", DBURL)
...
modparam("permissions", "db_url", DBURL)

Implementation varies from module to module but you’ll have created the database tables and should be good to go implementing modules with database functionality.