Despite the fact it’s 2020 there’s still a lot of folks in the world manually configuring boxes,
Ansible is a topic I could talk all day about, but in essence it’s kind of an automation framework, tell Ansible what to do one and it can spin you up two boxes, or two thousand boxes and manage the config on them.
I talked about DMQ, the Distributed Message Queue in a Kamailio Bytes post some time ago, and so as an example I’ll share an example playbook to Install Kamailio the lazy way from the Repos, and load the DMQ config with the IP Address and DMQ Address pulled from variables based on the host itself.
There’s a huge number of posts on installing and the basics of Ansible online, if you’re not familiar with Ansible already I’d suggest starting by learning the basics and then rejoining us.
The Hosts
Depending on if your hosts are running on bare metal, VMWare VMs or cloud based, I’m going to assume you’re working with a Debian system.
I’ve already got 3 servers ready to go, they’ve got sequential IP Addresses so I’ve added the range to my /etc/ansible/hosts file:
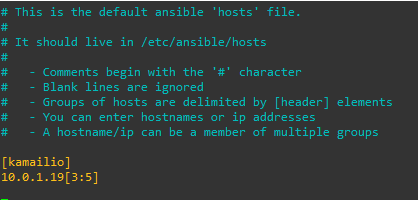
I’ve created the group kamailio and put the IP Address range 10.0.1.193 to 10.0.1.195 in there.
You will probably need to add the authentication info, such as passwords, private keys and privilege escalation details, but I’m going to assume you’ve already done that and you can run the ping module on each one:
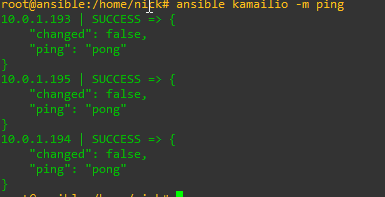
ansible kamailio -m ping
Assuming that comes back OK and you can get into each one let’s move onto the Playbook.
The Playbook
There’s a few tasks we’ll get out of the way before we configure Kamailio,
The first of which is adding the Debian repo and the keys,
Next we’ll load a Kamailio config from a template that fills in our IP Address and Kamailio version, then we’ll install Kamailio,
Rather than talk you through each of the plays here’s a copy of my playbook:
---
- name: Configure Kamailio


  hosts: kamailio
  become: yes

  vars:
    kamailio_version: "53"
    debian_sources_dir: "/etc/apt/sources.list.d"

  tasks:


    - name: Add keys for Kamailio repo
      apt_key:
        url: http://deb.kamailio.org/kamailiodebkey.gpg
        state: present


    - name: Add repo to sources.list
      apt_repository:
        repo: deb http://deb.kamailio.org/kamailio{{kamailio_version}} {{hostvars[inventory_hostname]['ansible_lsb']['codename']}} main
                #The full list of Debian repos can be found at http://deb.kamailio.org/
                #The version is based off the versions listed there and the release is based on the codename of the Debian / Ubuntu release.
        state: present


    - name: Copy Config Template
                #Copies config from the template, fills in variables and uplaods to the server
      template:
        src: kamailio.cfg.j2
        dest: /etc/kamailio/kamailio.cfg
        owner: root
        group: root
        backup: yes
      register: config_changed

    - name: Install Kamailio
                #Updates cache (apt-get update) and then installs Kamailio
      apt:
        name: kamailio
        update_cache: yes
        state: present
      register: kamailio_installed_firstrun

    - name: Restart Kamailio if config changed
      service:
       name: kamailio
       state: restarted
      when: config_changed.changed

    - name: Start Kamailio if installed for the first time
      service:
       name: kamailio
       state: started
      when: kamailio_installed_firstrun.changed
Should be pretty straight forward to anyone who’s used Ansible before, but the real magic happens in the template module. Let’s take a look;
Kamailio config in Jinja2 template
Pusing out static config is one thing, but things like IP Addresses, FQDNs and SSL certs may differ from machine to machine, so instead of just pushing one config, I’ve created a config and added some variables in Jinja2 format to the config, that will be filled with the value on the target when pushed out.
In the template module of the playbook you can see I’ve specified the file kamailio.cfg.j2 this is just a regular Kamailio config file but I’ve added some variables, let’s look at how that’s done.
On the machine 10.0.1.194 we want it to listen on 10.0.1.194, we could put list 0.0.0.0 but this can lead to security concerns, so instead let’s specify the IP in the Jinja config,
listen=udp:{{ ansible_default_ipv4.address }}:5060
listen=tcp:{{ ansible_default_ipv4.address }}:5060
listen=udp:{{ ansible_default_ipv4.address }}:5090
By putting ansible_default_ipv4.address in two sets of curly brackets, this tells Ansible to fill in thes values from the template with the Ansible IPv4 Address of the target machine.
Let’s take a look on the 10.0.1.194’s actual kamailio.cfg file:

Let’s take another example,
To keep DMQ humming it makes sense to have different DMQ domains for different versions of Kamailio, so in the Kamailio config file template I’ve called the variable kamailio_version in the DMQ address,

This means on a Kamailio 5.2 version this URL look like this on the boxes’ config:
# ---- dmq params ----
modparam("dmq", "server_address", "sip:10.0.1.194:5090")
modparam("dmq", "notification_address", "sip:dmq-53.nickvsnetworking.com:5090")
Running It
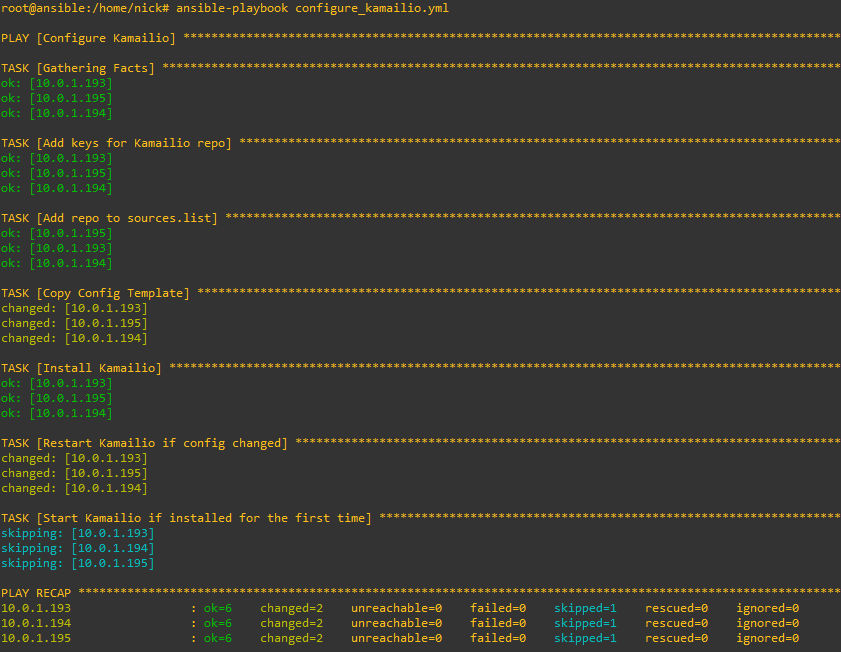
Running it is just a simple matter of calling ansible-playbook and pointing it at the playbook we created, here’s how it looks setting up the 3 hosts from their vanilla state:
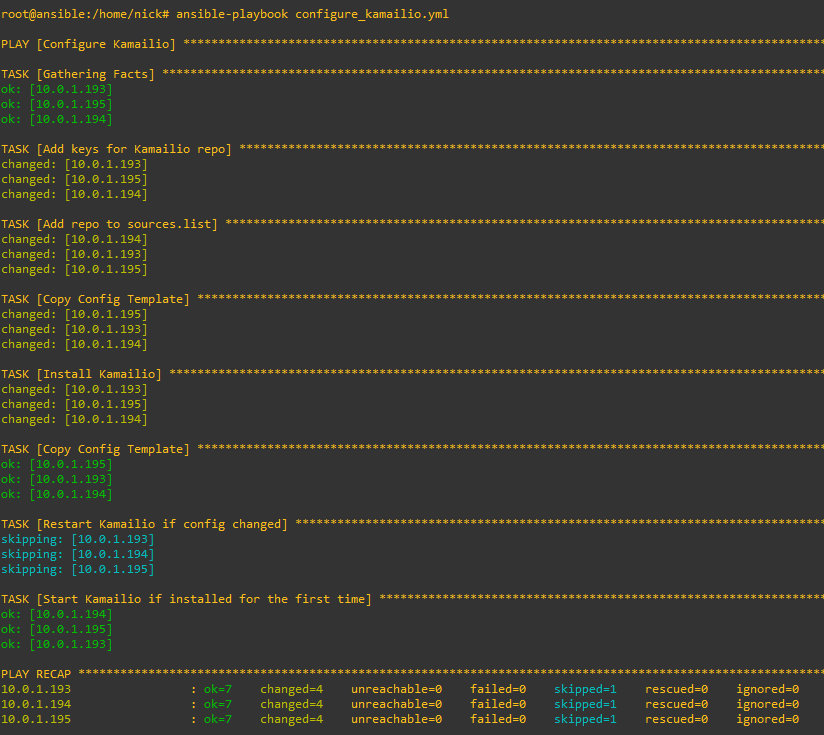
The great thing about Kamailio is it’s omnipotent – This means it will detect if it needs to do each of the tasks specified in the playbook.
So if we run this again it won’t try and add the repo, GPG keys, install Kamailio and load the template, it’ll look and see each of those steps have already been done and skip each of them.

But what if someone makes some local changes on one of the boxes, let’s look at what happens:
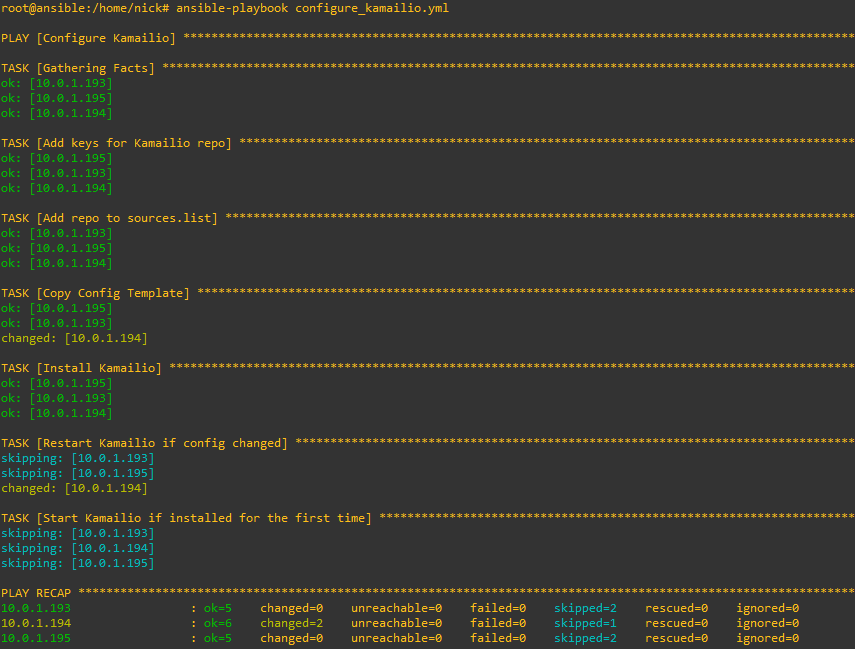
Likewise now if we decide to change our config we only need to update the template file and Ansible will push it out to all our machines, I’ve added a comment into the Kamailio template, so let’s run it again and see the config pushed out to all the Kamailio instances and them restarting.
Hopefully this gives you a bit more of an idea of how to manage a large number of Kamailio instances at scale, as always I’ve put my running code on GitHub, Ansible Playbook (configure_kamailio.yml) and Kamailio Jinja config template (kamailio.cfg.j2)
