
Most people think of SIP when it comes to FreeSWITCH, Asterisk and Kamailio, but all three support WebRTC.
FreeSWITCH makes WebRTC fairly easy to use and treats it much the same way as any SIP endpoint, in terms of registration and diaplan.
Setting up the SIP Profile
On the SIP profile we’ll need to activate WebRTC you’ll need to ensure a few lines of config are present:
    <!-- for sip over secure websocket support -->
    <!-- You need wss.pem in $${certs_dir} for wss or one will be created for you -->
    <param name="wss-binding" value=":7443"/>
Next you’ll need to restart FreeSWITCH and a self-signed certificate should get loaded,
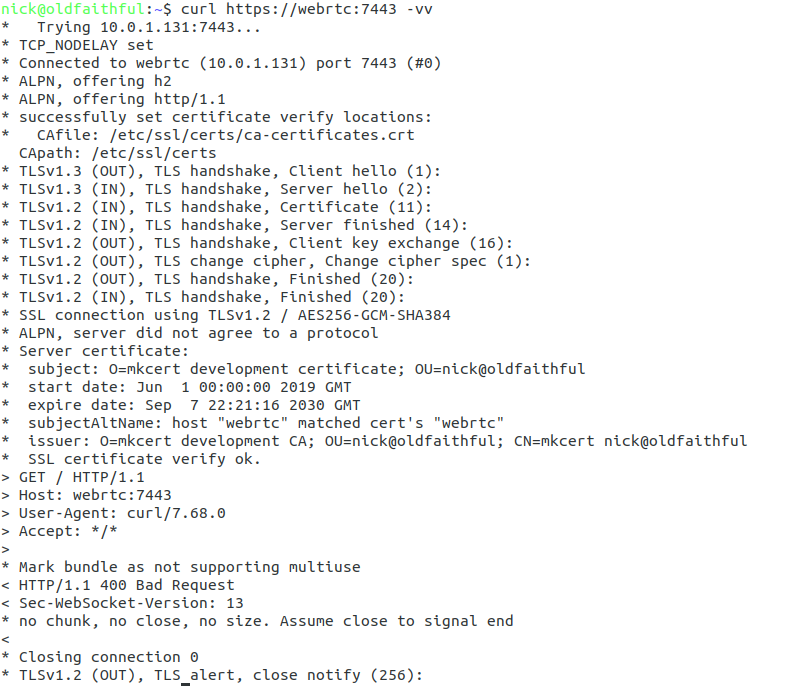
Once you’ve restarted FreeSWITCH will fail to detect any WebSocket certificate and generate a self signed certificate for you. This means that you can verify FreeSWITCH is listening as expected using Curl:
curl https://yourhostname:7443 -vvv

You should see an error regarding the connection failing due to an invalid certificate, if so, great! Let’s put in a valid certificate.
If not double check the firewall on your server allow traffic to port TCP 7443,
Loading your TLS Certificate
WebRTC & websocket are recent standards – this means a valid TLS certificate is mandatory. So to get this to work you’ll need a valid SSL certificate.
Let’sEncrypt should work fine, if you’ve got your own CA that’s in the trusted CA list on your machine that’ll do, or I’m using a cert I generated with Mkcert.
When we restarted FreeSWITCH after adding the wss-binding config a certificate was automatically generated in the $${certs_dir} of FreeSWITCH,
You can verify where the certs_dir is by echoing out the variable in FreeSWITCH:
fs_cli -x 'eval $${certs_dir}'

Unless you’ve changed it you’ll probably find your certs in /etc/freeswitch/tls/
The certificate and private key are stored in a single file, with the Certificate and the Private Key appended to the end,
In my case the certificate is called “webrtc.pem” and the private key file is “webrtc-key.pem”,
I’ll need to start by replacing the contents of the current certificate/ key file wss.pem with the certificate I’ve got webrtc.pem, and then appending the private key – webrtc-key.pem to the end of wss.pem,
cat /home/nick/webrtc.pem > /etc/freeswitch/tls/wss.pem
cat /home/nick/webrtc-key.pem >> /etc/freeswitch/tls/wss.pem
Next up I’ll restart FreeSWITCH, and run Curl again to verify this time the certificate is valid:
curl https://yourhostname:7443 -vvv
All going well no certificate error will be reported and we can setup our WebRTC client.
Configuring sipML5
Dubango Telecom’s sipML5 is a BSD licenced HTML5 SIP client,
I’ll use the demo version on their website to connect to my FreeSWITCH WebRTC server, which you can run in your browser from here,
We’ll start by clicking the “Export Mode” button to set our wss:// URL;
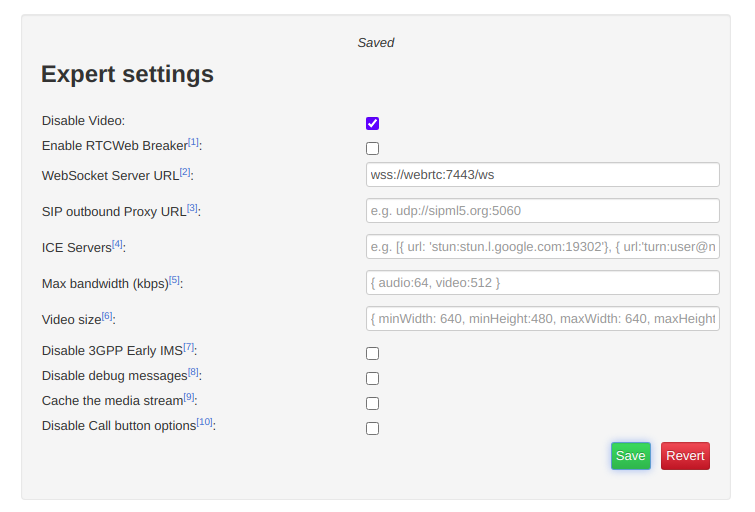
If you’re running behind a NAT adding ICE servers is probably a good idea, although this will slow down connection times, you can use Google’s public STUN server by pasting in the below value:
[{ url: 'stun:stun.l.google.com:19302'}]
Finally we’ll save those settings and return back to the main tab,
You’ll need to register with a username and password that’s valid on the FreeSWITCH box, in my case I’m using 1000 with the password 1000 (exists by default),
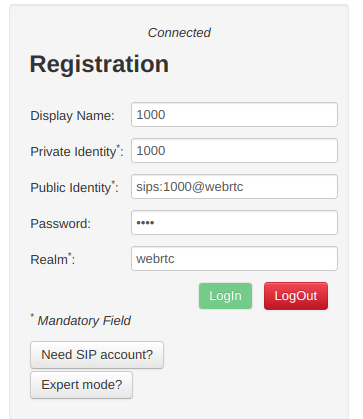
Replace webrtc with the domain name of your FreeSWITCH instance,
Finally you should be able to click Login and see Connected above,
Then we can make calls to endpoints on FreeSWITCH using the dial box;
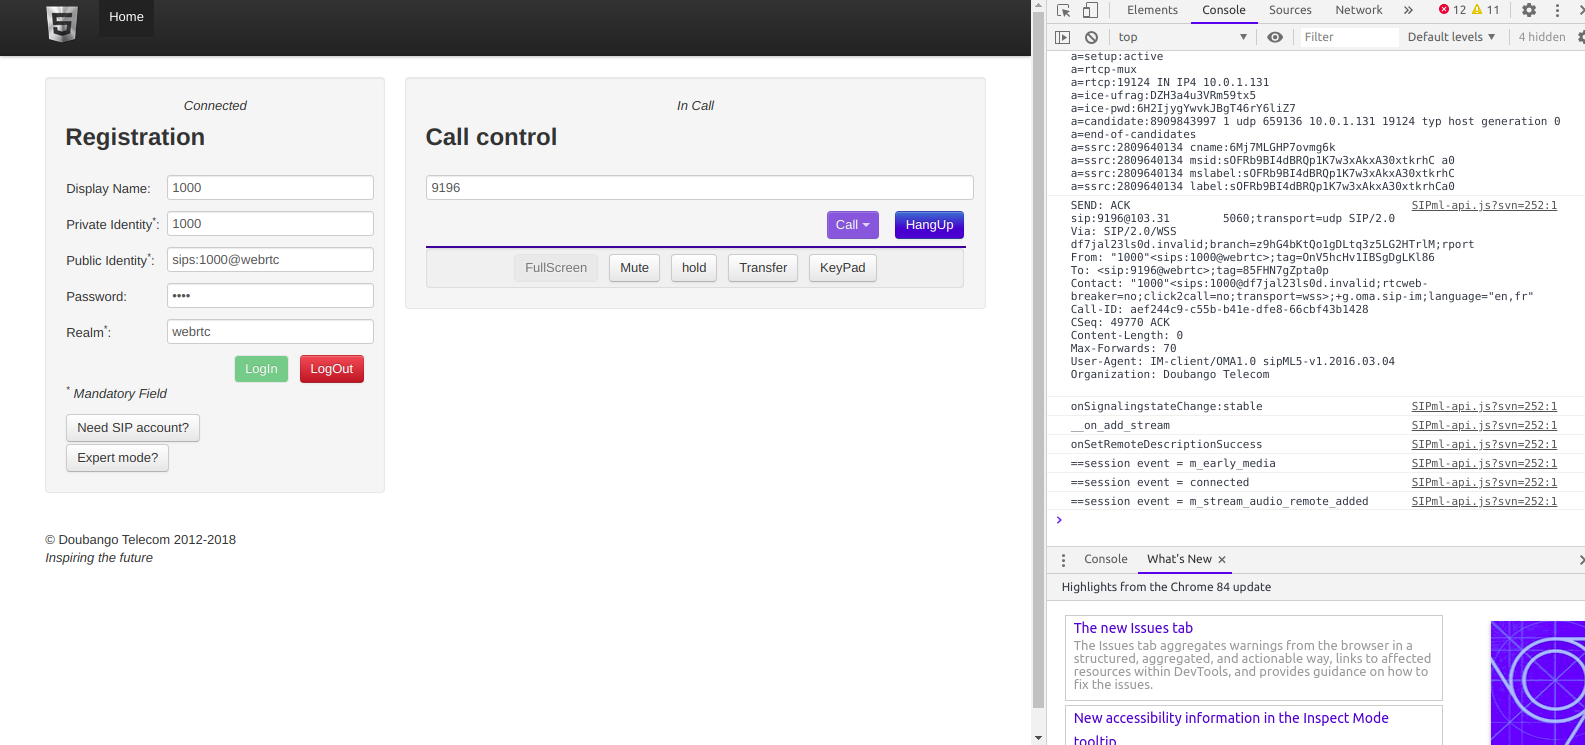
The Debug console in your browser will provide all the info you need to debug any issues, and you can trace WebSocket traffic using Sofia like any other SIP traffic.
Hopefully this was useful to you – I’ll cover more of WebRTC on Asterisk and also Kamailio in later posts!
Hey Nick!
I followed exactly as your tutorial. When I run the curl command. It says the SSL certificate verify ok.
The port is running and everything is ok but as soon as I login the sipML5 gives no response and keeps saying failed to connect to the server. Console gives me this log -> WebSocket connection to ‘wss://webrtc:7443/’ failed:
I am not sure why did you add /ws in the end of your wss address. (“wss://webrtc:7443/ws”)
Is that the reason to why am I unable to connect to the wss socket.
Please help me. I am stuck.